Setting Up with Amazon EC2
If you’ve already signed up for Amazon Web Services (AWS), you can start using Amazon EC2 immediately. You can open the Amazon EC2 console, click Launch Instance, and follow the steps in the launch wizard to launch your first instance.
If you haven’t signed up for AWS yet, or if you need assistance launching your first instance, complete the following tasks to get set up to use Amazon EC2:
1. Sign Up for AWS
2. Create an IAM User
3. Create a Key Pair
4. Create a Virtual Private Cloud (VPC)
5. Create a Security Group
Sign Up for AWS
When you sign up for Amazon Web Services (AWS), your AWS account is automatically signed up for all services in AWS, including Amazon EC2. You are charged only for the services that you use.
With Amazon EC2, you pay only for what you use. If you are a new AWS customer, you can get started with Amazon EC2 for free.
If you have an AWS account already, skip to the next task. If you don’t have an AWS account, use the following procedure to create one.
- Open https://aws.amazon.com/, and then choose Create an AWS Account.
- Follow the online instructions.
Part of the sign-up procedure involves receiving a phone call and entering a PIN using the phone keypad.
Note your AWS account number, because you’ll need it for the next task.
Create an IAM User
Services in AWS, such as Amazon EC2, require that you provide credentials when you access them, so that the service can determine whether you have permission to access its resources. The console requires your password. You can create access keys for your AWS account to access the command line interface or API. However, we don’t recommend that you access AWS using the credentials for your AWS account; we recommend that you use AWS Identity and Access Management (IAM) instead. Create an IAM user, and then add the user to an IAM group with administrative permissions or and grant this user administrative permissions. You can then access AWS using a special URL and the credentials for the IAM user.
If you signed up for AWS but have not created an IAM user for yourself, you can create one using the IAM console.
To create a group for administrators
- Sign in to the Identity and Access Management (IAM) console at https://console.aws.amazon.com/iam/.
- In the navigation pane, choose Groups, and then choose Create New Group.
- For Group Name, type a name for your group, such as
Administrators, and then choose Next Step. - In the list of policies, select the check box next to the AdministratorAccess policy. You can use the Filtermenu and the Search box to filter the list of policies.
- Choose Next Step, and then choose Create Group.
- Your new group is listed under Group Name.
To create an IAM user for yourself, add the user to the administrators group, and create a password for the user
- In the navigation pane, choose Users, and then choose Create New Users.
- In box 1, type a user name.
- Clear the check box next to Generate an access key for each user.
- Choose Create.
- In the list of users, choose the name (not the check box) of the user you just created. You can use the Searchbox to search for the user name.
- Choose the Groups tab and then choose Add User to Groups.
- Select the check box next to the administrators group. Then choose Add to Groups.
- Choose the Security Credentials tab. Under Sign-In Credentials, choose Manage Password.
- Select Assign a custom password. Then type a password in the Password and Confirm Password boxes. When you are finished, choose Apply.
To sign in as this new IAM user, sign out of the AWS console, then use the following URL, whereyour_aws_account_id is your AWS account number without the hyphens (for example, if your AWS account number is 1234-5678-9012, your AWS account ID is 123456789012):
https://your_aws_account_id.signin.aws.amazon.com/console/Enter the IAM user name (not your email address) and password that you just created. When you’re signed in, the navigation bar displays “your_user_name @ your_aws_account_id“.
If you don’t want the URL for your sign-in page to contain your AWS account ID, you can create an account alias. From the IAM console, click Dashboard in the navigation pane. From the dashboard, click Customize and enter an alias such as your company name. To sign in after you create an account alias, use the following URL:
https://your_account_alias.signin.aws.amazon.com/console/To verify the sign-in link for IAM users for your account, open the IAM console and check under IAM users sign-in link on the dashboard.
Create a Key Pair
AWS uses public-key cryptography to secure the login information for your instance. A Linux instance has no password; you use a key pair to log in to your instance securely. You specify the name of the key pair when you launch your instance, then provide the private key when you log in using SSH.
If you haven’t created a key pair already, you can create one using the Amazon EC2 console. Note that if you plan to launch instances in multiple regions, you’ll need to create a key pair in each region.
-
- Sign in to AWS using the URL that you created in the previous section.
- From the AWS dashboard, choose EC2 to open the Amazon EC2 console.
- From the navigation bar, select a region for the key pair. You can select any region that’s available to you, regardless of your location. However, key pairs are specific to a region; for example, if you plan to launch an instance in the US West (Oregon) region, you must create a key pair for the instance in the US West (Oregon) region.

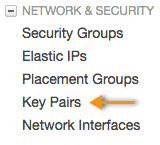
- In the navigation pane, under NETWORK & SECURITY, click Key Pairs.
Tip
The navigation pane is on the left side of the console. If you do not see the pane, it might be minimized; click the arrow to expand the pane. You may have to scroll down to see the Key Pairslink.
- Click Create Key Pair.
- Enter a name for the new key pair in the Key pair name field of the Create Key Pair dialog box, and then click Create. Choose a name that is easy for you to remember, such as your IAM user name, followed by
-key-pair, plus the region name. For example, me-key-pair-uswest2. - The private key file is automatically downloaded by your browser. The base file name is the name you specified as the name of your key pair, and the file name extension is
.pem. Save the private key file in a safe place.
Important
This is the only chance for you to save the private key file. You’ll need to provide the name of your key pair when you launch an instance and the corresponding private key each time you connect to the instance. - If you will use an SSH client on a Mac or Linux computer to connect to your Linux instance, use the following command to set the permissions of your private key file so that only you can read it.
$ chmod 400 your_user_name-key-pair-region_name.pem


To connect to your instance using your key pair
To connect to your Linux instance from a computer running Mac or Linux, you’ll specify the .pem file to your SSH client with the -i option and the path to your private key. To connect to your Linux instance from a computer running Windows, you can use either MindTerm or PuTTY. If you plan to use PuTTY, you’ll need to install it and use the following procedure to convert the .pem file to a .ppk file.
(Optional) To prepare to connect to a Linux instance from Windows using PuTTY
- Download and install PuTTY from https://www.chiark.greenend.org.uk/~sgtatham/putty/. Be sure to install the entire suite.
- Start PuTTYgen (for example, from the Start menu, click All Programs > PuTTY > PuTTYgen).
- Under Type of key to generate, select SSH-2 RSA.

- Click Load. By default, PuTTYgen displays only files with the extension
.ppk. To locate your.pemfile, select the option to display files of all types.
- Select the private key file that you created in the previous procedure and click Open. Click OK to dismiss the confirmation dialog box.
- Click Save private key. PuTTYgen displays a warning about saving the key without a passphrase. Click Yes.
- Specify the same name for the key that you used for the key pair. PuTTY automatically adds the
.ppkfile extension.


Create a Virtual Private Cloud (VPC)
Amazon VPC enables you to launch AWS resources into a virtual network that you’ve defined. If you have a default VPC, you can skip this section and move to the next task, Create a Security Group. To determine whether you have a default VPC. Otherwise, you can create a nondefault VPC in your account using the steps below.
Important
If your account supports EC2-Classic in a region, then you do not have a default VPC in that region. T2 instances must be launched into a VPC.
- Open the Amazon VPC console at https://console.aws.amazon.com/vpc/.
- From the navigation bar, select a region for the VPC. VPCs are specific to a region, so you should select the same region in which you created your key pair.
- On the VPC dashboard, click Start VPC Wizard.
- On the Step 1: Select a VPC Configuration page, ensure that VPC with a Single Public Subnet is selected, and click Select.
- On the Step 2: VPC with a Single Public Subnet page, enter a friendly name for your VPC in the VPC namefield. Leave the other default configuration settings, and click Create VPC. On the confirmation page, clickOK.
Create a Security Group
Security groups act as a firewall for associated instances, controlling both inbound and outbound traffic at the instance level. You must add rules to a security group that enable you to connect to your instance from your IP address using SSH. You can also add rules that allow inbound and outbound HTTP and HTTPS access from anywhere.
Note that if you plan to launch instances in multiple regions, you’ll need to create a security group in each region.
Prerequisites
You’ll need the public IP address of your local computer, which you can get using a service. To locate another service that provides your IP address, use the search phrase “what is my IP address.” If you are connecting through an Internet service provider (ISP) or from behind a firewall without a static IP address, you need to find out the range of IP addresses used by client computers.
To create a security group with least privilege
- Open the Amazon EC2 console.
TipAlternatively, you can use the Amazon VPC console to create a security group. However, the instructions in this procedure don’t match the Amazon VPC console. Therefore, if you switched to the Amazon VPC console in the previous section, either switch back to the Amazon EC2 console and use these instructions, or use the instructions inSet Up a Security Group for Your VPC in theAmazon VPC Getting Started Guide. - From the navigation bar, select a region for the security group. Security groups are specific to a region, so you should select the same region in which you created your key pair.
- Click Security Groups in the navigation pane.
- Click Create Security Group.
- Enter a name for the new security group and a description. Choose a name that is easy for you to remember, such as your IAM user name, followed by _SG_, plus the region name. For example, me_SG_uswest2.
- In the VPC list, select your VPC. If you have a default VPC, it’s the one that is marked with an asterisk (*).
NoteIf your account supports EC2-Classic, select the VPC that you created in the previous task. - On the Inbound tab, create the following rules (click Add Rule for each new rule), and then click Create:
- On the Inbound tab, create the following rules (click Add Rule for each new rule), and then click Create:
- Select HTTP from the Type list, and make sure that Source is set to Anywhere (
0.0.0.0/0). - Select HTTPS from the Type list, and make sure that Source is set to Anywhere (
0.0.0.0/0). - Select SSH from the Type list. In the Source box, ensure Custom IP is selected, and specify the public IP address of your computer or network in CIDR notation. To specify an individual IP address in CIDR notation, add the routing prefix
/32. For example, if your IP address is203.0.113.25, specify203.0.113.25/32.
- Select HTTP from the Type list, and make sure that Source is set to Anywhere (
Source By: <docs.aws.amazon.com>
To Become AWS Certified please Check out the Link;
