

Source By: <docs.aws.amazon.com>
Getting Started with Elastic Load Balancing
This tutorial provides a hands-on introduction to Application Load Balancers through the AWS Management Console, a web-based interface. To create your first Application Load Balancer, complete the following steps.
Tasks
- Before You Begin
- Step 1: Select a Load Balancer Type
- Step 2: Configure Your Load Balancer and Listener
- Step 3: Configure a Security Group for Your Load Balancer
- Step 4: Configure Your Target Group
- Step 5: Register Targets with Your Target Group
- Step 6: Create and Test Your Load Balancer
- Step 7: Delete Your Load Balancer (Optional)
Before You Begin
- Decide which two Availability Zones you will use for your EC2 instances. Verify that your virtual private cloud (VPC) has at least one public subnet in each of these Availability Zones.
- Launch at least one EC2 instance in each Availability Zone. For this exercise, you can simply use the public subnets. Be sure to install a web server, such as Apache or Internet Information Services (IIS), on each EC2 instance.
- Ensure that the security group for your EC2 instances allows HTTP access on port 80. To test the web server, copy the DNS name of the instance into the address field of an Internet-connected web browser and verify that the browser displays the default page of the web server.
Step 1: Select a Load Balancer Type
Elastic Load Balancing supports two types of load balancers: Application Load Balancers and Classic Load Balancers. For this tutorial, you create an Application Load Balancer.
To create an Application Load Balancer
- Open the Amazon EC2 console at https://console.aws.amazon.com/ec2/.
- On the navigation bar, choose a region for your load balancer. Be sure to select the same region that you used for your EC2 instances.
- On the navigation pane, under LOAD BALANCING, choose Load Balancers.
- Choose Create Load Balancer.
- Choose Application Load Balancer, and then choose Continue.
Step 2: Configure Your Load Balancer and Listener
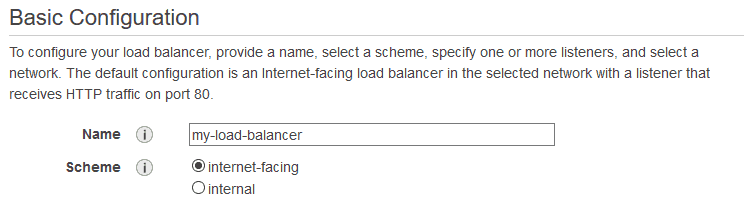
On the Configure Load Balancer page, complete the following procedure.
To configure your load balancer and listener
- For Name, type a name for your load balancer.The name of your Application Load Balancer must be unique within your set of Application Load Balancers for the region, can have a maximum of 32 characters, can contain only alphanumeric characters and hyphens, and must not begin or end with a hyphen.
- For Scheme, keep the default value, internet-facing.
- For IP address type, select ipv4 if your instances support IPv4 addresses or dualstack if they support IPv4 and IPv6 addresses.
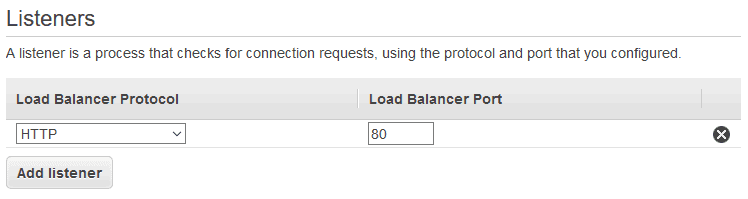
- For Listeners, keep the default, which is a listener that accepts HTTP traffic on port 80.
- For Availability Zones, select the VPC that you used for your EC2 instances. For each of the two Availability Zones that contain your EC2 instances, select the Availability Zone and then select the public subnet for that Availability Zone.
- Choose Next: Configure Security Settings.
- For this tutorial, you are not using a secure listener. Choose Next: Configure Security Groups.
Step 3: Configure a Security Group for Your Load Balancer
The security group for your load balancer must allow it to communicate with registered targets on both the listener port and the health check port. The console can create security groups for your load balancer on your behalf, with rules that specify the correct protocols and ports.
Note
If you prefer, you can create and select your own security group instead.
On the Configure Security Groups page, complete the following procedure to have Elastic Load Balancing create a security group for your load balancer on your behalf.
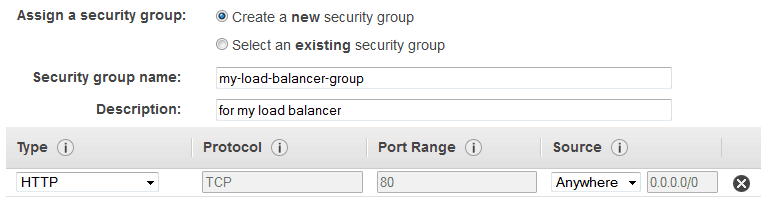
To configure a security group for your load balancer
- Choose Create a new security group.
- Type a name and description for the security group, or keep the default name and description. This new security group contains a rule that allows traffic to the load balancer listener port that you selected on the Configure Load Balancer page.
- Choose Next: Configure Routing.
Step 4: Configure Your Target Group
Create a target group, which is used in request routing. The default rule for your listener routes requests to the registered targets in this target group. The load balancer checks the health of targets in this target group using the health check settings defined for the target group. On the Configure Routing page, complete the following procedure.
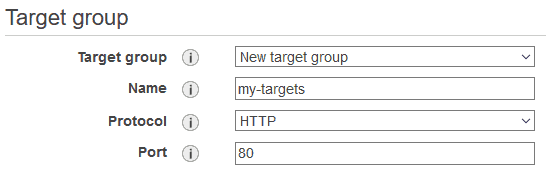
To configure your target group
- For Target group, keep the default, New target group.
- For Name, type a name for the new target group.
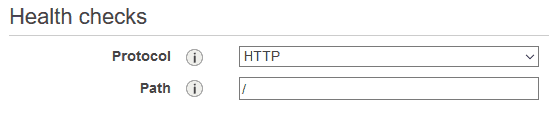
- Keep Protocol as HTTP and Port as 80.
For Health checks, keep the default protocol and ping path.
- Choose Next: Register Targets.
Step 5: Register Targets with Your Target Group
On the Register Targets page, complete the following procedure.
To register targets with the target group
- For Instances, select one or more instances.
- Keep the default port, 80, and choose Add to registered.
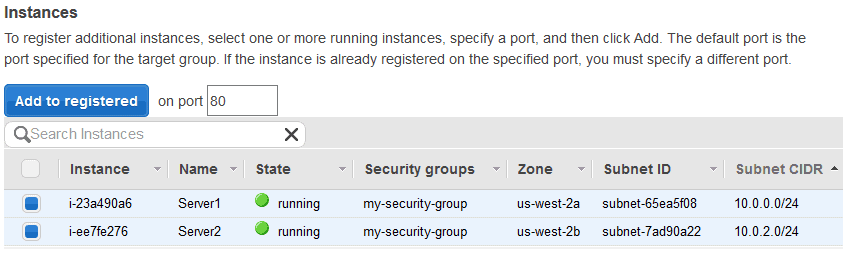
- If you need to remove an instance that you selected, for Registered instances, select the instance and then choose Remove.
- When you have finished selecting instances, choose Next: Review.
Step 6: Create and Test Your Load Balancer
Before creating the load balancer, review the settings that you selected. After creating the load balancer, verify that it’s sending traffic to your EC2 instances.
To create and test your load balancer
- On the Review page, choose Create.
- After you are notified that your load balancer was created successfully, choose Close.
- On the navigation pane, under LOAD BALANCING, choose Target Groups.
- Select the newly created target group.
- On the Targets tab, verify that your instances are ready. If the status of an instance is initial, it’s probably because the instance is still in the process of being registered, or it has not passed the minimum number of health checks to be considered healthy. After the status of at least one instance is healthy, you can test your load balancer.
- On the navigation pane, under LOAD BALANCING, choose Load Balancers.
- On the Description tab, copy the DNS name of the load balancer (for example, my-load-balancer-1234567890.us-west-2.elb.amazonaws.com). Paste the DNS name into the address field of an Internet-connected web browser. If everything is working, the browser displays the default page of your server.
Step 7: Delete Your Load Balancer (Optional)
As soon as your load balancer becomes available, you are billed for each hour or partial hour that you keep it running. When you no longer need a load balancer, you can delete it. As soon as the load balancer is deleted, you stop incurring charges for it. Note that deleting a load balancer does not affect the targets registered with the load balancer. For example, your EC2 instances continue to run.
To delete your load balancer
- Open the Amazon EC2 console at https://console.aws.amazon.com/ec2/.
- On the navigation pane, under LOAD BALANCING, choose Load Balancers.
- Select the load balancer, and then choose Actions, Delete.
- When prompted for confirmation, choose Yes, Delete.
To Become AWS Certified please Check out this link;
Also published on Medium.
