

EBS Vs Instance Store, Snapshot, and Volume
- Instance Store Volumes are sometimes called Ephemeral Storage.
- Instance Store volumes cannot be stopped. If the underlying host fails, you will lose your data.
- EBS backed instances can be stopped. You will not lose the data in this instance if it is stopped.
- You can reboot both, you will not lose your data.
- By default, both ROOT volumes will be deleted on termination, however, with EBS volumes, you can tell AWS to keep the root device volume.
Amazon (EC2) Elastic Compute Cloud
- Amazon EC2 provides scalable virtual servers in the cloud. The virtual servers can run different operating systems but most commonly run a flavor of Linux or Windows.
- An EC2 virtual server is known as an “instance” and can be made up of different instance types and sizes.
- Pricing Models
- Reserved Instances
- Purchase reserved instances when you know the “amount of usage” you will be using for an instance. If an instance is needed 100% of the time purchasing reserved instances at a discount will reduce costs.
- On–‐Demand Instances
- Are used “on–‐demand” and are paid for by the hour. If you only need an instance for an hour only fire it up for that long!
- Spot Instances
- Bid on unused EC2 instances for “non-production applications”.
- Reserved Instances
Volumes Vs Snapshots
- Volumes exist on EBS
- Virtual Hard Disk
- Snapshots exist on S3
- You can take a snapshot of a volume, this will store that volume on S3
- Snapshots are incremental, this means that only the blocks that have changed since your last snapshot are moved to S3
- If this is your first snapshot, it may take some time to create
Volumes Vs Snapshots – Security
- Snapshots of encrypted volumes are encrypted automatically.
- Volumes restored from encrypted snapshots are encrypted automatically.
- You can share snapshots, but only if they are unencrypted.
- These snapshots can be shared with other AWS accounts or made public
Snapshots of Root Device Volumes
- To create a snapshot for Amazon EBS volumes that serve as root devices, you should stop the instance before taking the snapshot.
Now we will do a Lab
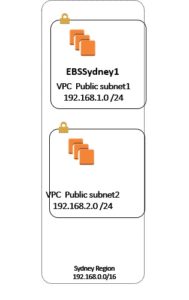
Step 1) I go to Sydney Section; in here I have a VPC =192.168.0.0 /16 and then we have two public Subnet 1, 2
192.168.1.0/24
192.168.2.0/24
Step 2) I will go to EC2 and pick one Windows 2008 server with EBS, and then I will see also under the Volume section on the left side it has the new Volume.
Step 3) Then after I log in, I will go to Windows 2008 server and rename it , then I will install IIS Web server , then I go to c:\intepub\wwwroot and create an index.html file and save it in this folder ( hint: make sure the extension is a .html file not .txt, make sure use folder option to find out if the extension is turn off )
Step 4) Now go and make sure you type IP address of the Public in IE or Google Chrome, you should be able to see the content of the homepage
Step 5) Now I will go stop and take Snapshot of this EC2, as we see when I select the EC2 called EBSSydney1, in here I can extend the volume size, let’s give the name Image of EBSSydeny1.
When you create an EBS image, an EBS snapshot will also be created for each of the above volumes.
Step 6) Now I will see “Image of EBSSydeny1” under AMI and also under the snapshot on the left side
Step 7) So what does it mean, I can have this as a baseline and start from this AMI, I can get another EC2 instance with an exact same software package ( Like IIS and web server).
Step 8) Now I will go and Start a new Launch of EC2, but in here I will use My AMI
Step 9) go thru same process as before and pick this New EC2 inside the public subnet 192.168.1.0/24 and give name EBSSydney2
Step 10) As we see as we go thru these steps ( I can uncheck Delete on termination, but I cannot do this when I do instance store )
Step 11) As we see now under the EC2 I will see two instances and also under the volume I will see two Volume
Step 12) Now I will connect to new EC2 called EBSSydney2 and RDP to it and also if I copy and paste the public address I should see the same content of EBSSydney1
Step 13) after login and put the password I will go and see I have IIS installed on folder c:\inetpub\wwwroot\index.html, then I will rename the Computer name to EBSSydeny2
Step 14) Now If I want I can increase the Volume size of EBSSydney1 from 30 GB to 35 GB, all I have to do go to Volume and click on action and then modify it.
Step 15) I will go and restart the EBSSydney1 and to see if I got for extra 5 GB Storage, as we see when I go to volume and I click on EBSydney1 and look under the Status tab; I will see some % that is trying to optimize it.
Step 17) Make sure State in-use – completed (100%)
Step 18) if you go to Server Manager at taskbar; then click on the storage; now I will see extra space of 5.00 GB and now all you have to do highlight it and then you can extend your C drive.
Step 19) now I can see C drive is 35GB
Step 20) Now let’s say I want to attach a new Volume to EBSydney1 as D Drive=50 GB; So I can go to Volume on the left and then create a new Volume ( here I can encrypt it) and then attached to EBSydney1
Here is the ID of new Volume: vol-0401eb87ba30edb96; ( for Example)
Step 21) Lets rename is called it “New Volume Made “Now on right side Column I will see it says available (instead of in use)
Step 22) let’s go an attached to EBSsydney1 (the size of volume is 50G)
Step 23) Now If I go to EC2 and click on EBSydney 1 and at the bottom, I will see both root and this extra attached Volume to it
Step 24) Now go to Ebsydney ( via RDP) and go to server manager and click on storge I will see this new 50 GB drive ( extra HD) and then I can right-click on it, initialed it and then right click and create a volume and use all 50 GB space and then give the Drive letter “D”
Step 25) Now I will have two Hard drive C and D drive. Let’s imagine my D drive is used for DATA, so I will go and store a file called Data.txt inside it.
Step 26) so Up to now I have two EC2
EBSsydney2 with C drive
EBSydney1 with C and D Drive
Step 27) Now since all of these EBS are attached to EC1 via network; I can detach the Volume D Drive from EBSsydney1 and connect to EBSsydney2
Step 28) After I do above and Detached, then I will see status as “Available”
Step 29) Now I will go and Attached this Volume ( D Drive) to EBSsydney2
Step 30) Now when I go EBSsydney1, I will see D drive is not there; but when I go to EBSsydney2, I will see it has D drive and also I will see my data is still there.
Step 31) So we see the EBS Volume can be attached to only one EC2 at a time, and now when I created the New Volume and if it was Encrypted the attached volume will be also encrypted.
Step 32) Now I will go and create Instance (instead of EBS) and we will see that I cannot stop it, but only Restart or Terminate
Step 33) Go to EC2 and Create a new EC2, then on the left side click on Community AMI; then make sure select Root type As “ Instance Store “
Step 34) go thru the process and pick first AMI, as you see there is no Free Tier and pick M3.meduim and then put public subnet
Step 35 ) On the add storage type; read it :
Your instance will be launched with the following storage device settings. You can attach additional instance store volumes to your instance. You can also attach additional EBS volumes after launching an instance, but not instance store volumes. Learn more about storage options in Amazon EC2.
Step 36) click Add new volume and as you see you do not have any good option and also you cannot click on “Delete on Termination “ and also you cannot encrypt. Give the name
InstanceSydney1
Step 37) As you see it is not FREE; so as soon as we did it we will delete it.
Step 38) As you see when you created an Instance Store; you do not have any Volume ( like when we created the EBS stuff)
Step 39) now when you click action and look at the state I can only reboot or Terminate; so I cannot stop it, I cannot take the image of it.
Part 1
Part2
Want more information on how to become Amazon AWS Certified? Learn more!
