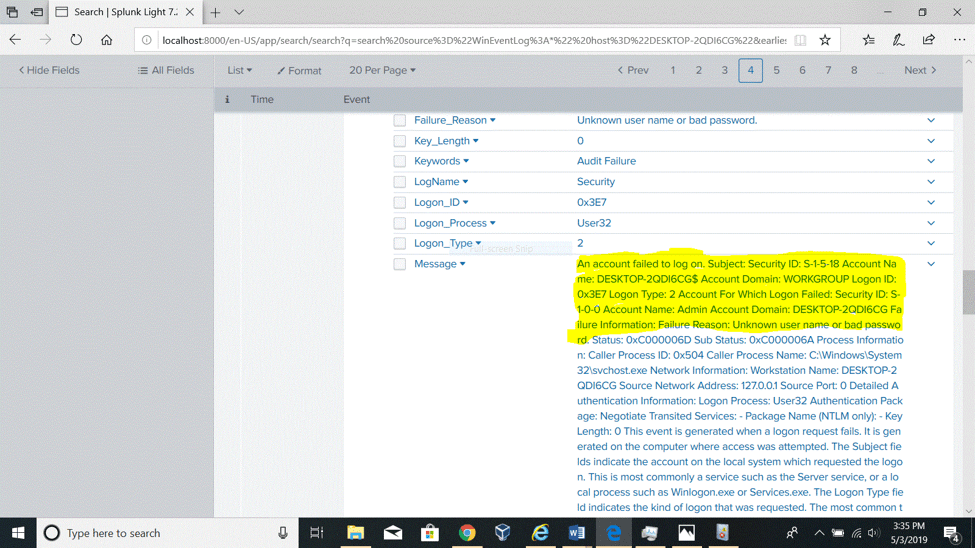
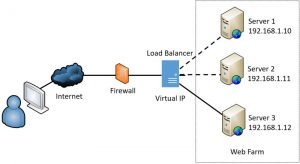
Posted by & filed under Amazon AWS, Splunk.

Tech Brief Exerpts

When it comes to the cloud, you can’t secure, operate or manage costs for what you can’t see. As more of your critical workloads move to AWS, you need end-to-end visibility to:

• Ensure AWS deployments meet or exceed security and compliance standards
• Guarantee AWS-based applications and services meet defined SLAs
• Gain critical security, operational and cost management insights across your entire AWS environment.


Splunk solutions make it easy to gain end-to-end visibility across your AWS and hybrid environment. Deploy as software (Splunk Enterprise) or as a cloud service (Splunk Cloud) to gain a complete view of your cloud, applications and services. Leverage the free Splunk App for AWS (available on Splunk Enterprise, Splunk Cloud and Splunk Insights in AWS Marketplace) to gain critical security, operational and cost optimization insights into your AWS deployment.

Splunk’s Portfolio of Cloud Solutions Includes:

  • Splunk App for AWS: Provides pre-built dashboards, reports and alerts that instantly deliver critical operational and security insights into your AWS deployment
  • Splunk Cloud: Delivers Operational Intelligence as a cloud service, backed by a 100% uptime SLA
  • Splunk Light (cloud service): Automates log search and analysis for small IT environments
  • Splunk Enterprise on AWS: Delivers Operational Intelligence as self-deployed software on AWS in a bring-your-own-license (BYOL) model
  • Amazon Machine Images: Accelerate deployment of Splunk Enterprise, Splunk Light and Hunk on AWS
  • Technology Integrations with AWS Lambda, Kinesis and IoT: Enables direct collection from AWS Lambda (via Splunk HTTP Event Collector) to enable monitoring of AWS Lambda applications as well as services natively integrated with Lambda (such as AWS Kinesis and AWS IoT service)
  • Hunk Integration with EMR/S3: Enables easy exploration of data in Amazon EMR and S3

Gain End-to-End AWS Visibility

The Splunk App for AWS offers a rich set of pre-built dashboards and reports to analyze and visualize data from numerous AWS services—including AWS
CloudTrail, AWS Config, AWS Config Rules, Amazon Inspector, Amazon RDS, Amazon CloudWatch, Amazon VPC Flow Logs, Amazon S3, Amazon ECS,
Amazon CloudFront, Amazon EBS, Amazon ELB and AWS Billing—all from a single, free app.

Splunk_and_Aws

Use Splunk as a Cloud Service

Splunk Cloud
Splunk Cloud is an AWS-based service that delivers the benefits of Splunk Enterprise with the flexibility of a cloud service. Using Splunk Cloud, you can search, analyze and visualize data from applications and devices across your entire environment, including AWS, on-premises data centers and any other public/private cloud environments. Splunk Cloud meets the highest levels of security and reliability, having completed SOC2 Type 2 attestation and ISO 27001 certification. Splunk Cloud is available in over 10 AWS Regions
globally, including AWS GovCloud (US).

Deploy Splunk Enterprise on AWS

If you prefer to deploy and manage software rather than a cloud service, Splunk Enterprise is perfect for deploying on AWS. It’s self-contained and can be easily deployed on any Amazon Elastic Compute Cloud (EC2) instance. Splunk Enterprise also scales horizontally, making it ideal for an AWS deployment.

splunk_Aws

Posted by & filed under Splunk.

Introduction

Cyber-crime is rising constantly as attackers are coming up with new tools and attacks techniques. To defend the network and protect companies against cyber-attacks, security professionals need security tools such as IDS, IPS, SIEMS. For my network defense tool assignment, I have decided to research about Splunk, one of the most popular Security Information and Event Management (SIEM) in the cybersecurity industry. According to a report published on the site, www.itcentralstation.com, Splunk is the best SIEM tool in 2019.  It was conceived by founders Rob Das and Erik Swan between 2002 and 2004 to collect data from different sources, detect security events and to perform real time monitoring. There are several types and licensing models of Splunk available to suit the needs of its customer base. The most popular products are Splunk Enterprise, Splunk Cloud, and Splunk Light. My work will be based on the installation of the free version of Splunk light, its configuration, and its use case to detect a DoS attack,  NMAP scanning attack and failed login attempts.


  • Installation Process

A 1-Go to Splunk , and register for a free trial ( 30 days) to download  Splunk light.


Splunk_Core_Cert

2- After creating a Splunk account, choose the appropriate O.S version for the computer and click on the download link as shown in the figure below:


Splunk_Core_Cert

3- Open the download folder and click on the Splunk light installer as administrator.

4- Accept the license agreement, proceed with the default installation, and click “finish” when done.

Splunk_Core_Cert
Splunk_Core_Cert
Splunk_Core_Cert
  • Basic Configuration of Splunk light
  • Type “Splunklight” in the search bar and click on the icon to start the software.
  • When presented with the user interface, use the administrator credentials created during the installation process.

.

Splunk_Core_Cert
  • After a successful login, it is recommended to take a quick user tour to get familiar with Splunklight features such as the console which consists of the Search, the Datasets, the Reports, the Alerts, and the Dashboards tabs.

Search:

It allows users to search through data collected on the platform in different ways. It can be time based, source based, and source type based.

 Datasets:

Use the Datasets listing page to view and manage your existing datasets. Click a dataset name to view its contents. Click Pivot to design a visualization-rich report based on the dataset. Click Explore in Search to extend a dataset in Search and save it as a new report, alert, or dashboard panel.

Reports:

 Reports are based on single searches and can include visualizations, statistics and/or events


Alerts:

 Alerts set a condition that triggers an action, such as sending an email that contains the results of the triggering search to a list of people.


Dashboards:

 Dashboards include searches, visualizations, and input controls that capture and present available data.

Splunk_Core_Cert
  • It is important to properly set the source of the data we want to collect for analysis or monitoring on the platform. As shown in the figure below, there are three options such as uploading files from the host computer, monitoring directly from the Splunk instance, and from remote forwarder instances.
Splunk_Core_Cert

     5-The screenshots below show how I used Splunk light to collect my Windows 10 security event logs for further analysis by clicking on “local event log collection” link. Once the data is loaded and indexed onto the platform I can search through it by time range, source type and look for more details on each event. The visualization feature for a customized view.  I have saved a search and created an alert that will send me emails notification as administrator if similar events occur in the future. I can also perform a real time monitoring for the same event if I want to.


Splunk_Core_Cert
Splunk_Core_Cert
Splunk_Core_Cert
  • Using Splunk light to detect security events

1-Successful login on my windows 10 machine.


With the Search function I was able to detect the logon event that occurred when I logged in as administrator on my local windows 10 machine.


Splunk_Core_Cert

2- Failed logon attempt on the Windows 10 machine

Like in the example above, I searched through the collected logs files a failed logon attempt that is displayed in detail in the two figures below. Based on the details such as the time of the event, its id, the reason of the failure, I can initiate an investigation following the incident response process.

.

Splunk_Core_Cert
Splunk_Core_Cert

3-Saving the failed logon attempt as an alert.

Not only I was able to detect the failed logon attempt but had I the possibility to save it as an alert that will notify me whenever similar events occur in the future (scheduled alert). I may also set it for real time monitoring.

Splunk_Core_Cert
Splunk_Core_Cert

4- Firewall log analysis to detect dropped ICMP packets after a ping attempt from another host on the network.


Prior to the ping attempt from the windows 7 machine, I ensured  that the Windows firewall is enabled and the ICMP communication is not allowed by default. At the command line interface on a Windows 7 machine I tried to ping the Windows 10 host which is address is 192.168.1.12.

As highlighted in the third figure below on the Splunk platform, all the ICMP packets were dropped. Significant information such as the source ip address, the time of the event also appear in the detected event.


Splunk_Core_Cert
Splunk_Core_Cert
Splunk_Core_Cert
  • Detecting successful ICMP packets with Splunk light

Allowing ICMP packets through the firewall can be dangerous to the network. According to the book Guide to Network Defense and Countermeasures, “a DoS attack called an ICMP flood occurs when multiple packets are sent to a single host on a network. The result of this flood is that the server becomes so busy responding to the ICMP requests that it cannot process other traffic.” Prior to simulate the Dos attack on my Windows 10 machine, I kept the firewall enabled but allowed the ICMP traffic through it. The screenshots above illustrate each step of the simulation where I initiated multiple pings connections from the Windows 7 machine toward the windows 10. Those successive packets kept the Windows 10 machine’s CPU busy and unavailable to process legitime requests.


Splunk_Core_Cert
Splunk_Core_Cert
Splunk_Core_Cert
Splunk_Core_Cert
  • Saving Unsuccessful ping (ICMP packets detection) as a critical alert.


Because the use of ICMP protocol is risky for the network, any ICMP packet should be taken seriously and analyzed properly. Therefore, the detection above also is saved as a critical and a scheduled alert with email notification to the administrator.


Splunk_Core_Cert

-The last security event is NMAP scanning detection.

The screenshots below illustrate the scenario where I scanned the windows 10 machine for open ports using NMAP which I had previously installed on a Windows 8 server machine.


Splunk_Core_Cert
Splunk_Core_Cert
  • Summary and Conclusions


Through the installation and the use of Splunk light, I have gained more technical skills about the SIEM tool. I have learned how to collect firewall and event logs files and analyze security events upon detection. The simulation sections have enabled me to practice what I have learned about common network attacks such as login attacks, Denial of service attacks with ICMP packets and reconnaissance attack with NMAP scanning. In fact, the implementation of Splunk has been useful because it detected all those three security events that occurred on my Windows 10 machine. Therefore, security professionals should always configure Splunk for notification of critical alerts. In case of the detection of a failed logon attempt by Splunk, an administrator should follow the incident response process by investigation the event and find out the reason behind it and implement a countermeasure such as implementing account lockout policies. The best implementation against the DoS attack with ICMP packets is to disable the echo request rules in the firewall and the use of antivirus.


By Bidossessi Tobossou ( ASM Instructor)

Sources: James Miller, Implementing Splunk 7 – Third Edition, Randy Weaver, Guide to Network Defense and Countermeasures, Chap 3, Page 85, ITcentralstation, Splunk

Posted by & filed under Amazon AWS.

How to Enable Elastic IP addresses on AWS SFTP server endpoint?

To make your AWS SFTP server accessible using Elastic IP addresses, create an internet-facing endpoint for your server.

However, if you must change the listener port to a port other than port 22 (for migration), then follow these steps:

Important: Don’t proceed with the following steps if your listener port can be port 22. Instead, create an internet-facing endpoint for your server.

Create an Amazon VPC and allocate IP addresses

  1. 1.  Create an Amazon Virtual Private Cloud (Amazon VPC) in the same AWS Region as your AWS SFTP server.
  2. 2. Allocate three Elastic IP addresses in the same Region as your AWS SFTP server. Or, you can choose to bring your own IP address range (BYOIP).

  Create an Amazon VPC endpoint

  1. 1. Open the Amazon VPC console.
  2. 2. From the navigation pane, choose Endpoints.
  3. 3. Choose Create Endpoint.
  4. 4. For the Create Endpoint page, enter the following:
      For Service category, select AWS services.
      For Service Name, select the service name that ends with transfer.server. For example, if you’re in the us-east-1 Region, then select com.amazonaws.us-east-1.transfer.server.
      For VPC, select the Amazon VPC that you want to use for access to your SFTP server.
      For Subnets, select the three subnets that you want to use.
      For Enable Private DNS Name, keep Enable for this endpoint selected.
      For Security group, you can select existing security groups or you can create a new security group.
      Note: The security group that you use must allow inbound access on port 22 from the subnets of the load balancer that you’ll create in a later step.
  5. 5. Choose Create endpoint.
  6. 6. Under The following VPC Endpoint was created, choose the link to the endpoint to view its details.
  7. 7. Choose the Subnets tab.
  8. 8. Note the private IP addresses associated with each subnet. You need these IP addresses in a later step.

Configure the VPC endpoint on your AWS SFTP server

  1. 1. Open the AWS SFTP console.
  2. 2. Select your server. Choose Actions and then choose Stop.
  3. 3. After the server’s State changes to Offline, choose the link for Server ID to view the server’s configuration.
  4. 4. For Server configuration, choose Edit.
  5. 5. For Edit configuration, enter the following:
      For Endpoint type, choose VPC Endpoint.
      For VPC endpoint, select the endpoint that you created.
  6. 6. Choose Save.

Create a Network Load Balancer and define the Amazon VPC endpoint as the load balancer’s target

  1. 1. Open the Amazon Elastic Compute Cloud (Amazon EC2) console.
  2. 2. From the navigation pane, choose Load Balancers.
  3. 3. Choose Create Load Balancer.
  4. 4. Under Network Load Balancer, choose Create.
  5. 5. For Step 1: Configure Load Balancer, enter the following:
       For Name, enter a name for the load balancer.
       For Scheme, select internet-facing.
      For Listeners, keep Load Balancer Protocol as TCP. Then, change the associated Load Balancer Port to your custom listener port.
      For VPC, select the Amazon VPC that you want to use.
      For Availability Zones, select the Availability Zones associated with the three subnets that you want to use.
      For the IPv4 address of each subnet, select one of the Elastic IP addresses that you allocated.
  6.   Choose Next: Configure Security Settings.
  7. 7. Choose Next: Configure Routing.
  8. 8. For Step 3: Configure Routing, enter the following:
      For Target group, select New target group.
      For Name, enter a name for the target group.
      For Target type, select IP.
      For Protocol, select TCP.
      For Port, enter 22.
      Under Health checks, for Protocol, select TCP.
  9. 9. Choose Next: Register Targets.
  10. 10. For Step 4: Register Targets, enter the following:
      For Network, confirm that the Amazon VPC you want to use is selected.
      For IP, enter the private IP address of one of your Amazon VPC’s subnets. You copied these IP addresses when you created the Amazon VPC endpoint.
  11. 11. Choose Add to list.
  12. 12. Repeat steps 10 and 11 until you’ve entered the private IP addresses of all three subnets.
  13. 13. Choose Next: Review.
  14. 14. Choose Create.

Important: To control access to your server from client IP addresses, use the network access control lists (ACLs) for the subnets configured on the load balancer. Network ACL permissions are set at the subnet level, so access rules apply to all resources using the subnet. You can’t control access from client IP addresses using security groups, because the load balancer’s target type is set to IP instead of Instance. This means that the load balancer doesn’t preserve source IP addresses.

Test access to the server from an Elastic IP address

After you configure the Amazon VPC endpoint and the Network Load Balancer, you can test access to your AWS SFTP server. For example, the following OpenSSH command connects to the server from a specific IP address:

Note: Replace 192.0.2.3 with an Elastic IP address that you allocated.

sftp -i sftpuserkey -P [port] sftpuser@192.0.2.3

If the Network Load Balancer’s health checks fail, this means the load balancer can’t connect to the AWS SFTP endpoint. To troubleshoot this, check the following:

  • 1) Confirm that the VPC endpoint’s associated security group allows inbound connections from the subnets configured on the load balancer. The load balancer must be able to connect to the Amazon VPC endpoint over port 22.
  • 2) Confirm that the AWS SFTP server’s State is Online.

Our AWS Certified Solutions Architect – Associate certification training is for beginners and professionals who run enterprise architecture programs, as well as solutions architects. It covers deployment of AWS systems, AWS best practices, and many other topics. The AWS Course covers skills for working with the Amazon Cloud, Alexa, Amazon S3, Amazon EC2, autoscaling and load balancing, serverless websites and many more.

Our next AWS 5-day bootcamp will start soon!


Posted by & filed under Splunk.

Here is what you should know about Splunk!

What is Splunk?

Splunk is the world’s first Data-to-Everything Platform. Now organizations no longer need to worry about where their data is coming from, and they are free to focus on the business outcomes that data can deliver. Innovators in IT, Security, IoT and business operations can now get a complete view of their business in real time, turn data into business outcomes, and embrace technologies that prepare them for a data-driven future.

What Does a Splunk Core Certified User Do?

A Splunk Core Certified User is able to search, use fields, create alerts, use look-ups, and create basic statistical reports and dashboards in either the Splunk Enterprise or Splunk Cloud platforms. This optional entry-level certification demonstrates an individual’s basic ability to navigate and use Splunk software.

Average salary for different splunk job descriptions.

Splunk pays its employees an average of $128,607 a year. Salaries at Splunk range from an average of $85,276 to $181,095 a year. Splunk employees with the job title Software Engineer make the most with an average annual salary of $121,134, while employees with the title Software Engineer make the least with an average annual salary of $121,134.

An Example of Splunk's Operations.

Splunk is a software mainly used for searching, monitoring, and examining machine-generated Big Data through a web-style interface. Splunk performs capturing, indexing, and correlating the real-time data in a searchable container from which it can produce graphs, reports, alerts, dashboards, and visualizations.

Excerpt From Splunk Case Study


Why Splunk
Family Search planned to move to a continuous delivery model on AWS to increase business agility and more rapidly deliver features to its patrons. To do so, the company needed a monitoring service that could immediately detect changes across its website properties following the push of a new release. This service needed to support the cultural change to a Dev-Ops deployment model. To meet this need, Family  Search chose Splunk Cloud to help analyze logs from all components of its IT environment in real time, without additional developer effort. Leveraging Splunk Cloud, Family Search is now able to identify errors in real time and has successfully moved to continuous delivery with over 900 deploys per day.

Categories

The Splunk platform aggregates and analyzes digital exhaust from various sources, including application program interface (API) pulls and log files from applications, servers, mobile devices and websites. Turning machine data into operational intelligence helps Splunk’s customers gain an understanding of what’s happening across their IT systems and technology infrastructure in real-time in order to facilitate data-driven decision management.

Join our Splunk Training and get certified!

Posted by & filed under CompTIA A+, MICROSOFT MTA O/S.

Establishing Network Connections

Configure Microsoft Windows Networking on a Client/Desktop

CompTIA A+ Core 2 Section 1.8

VPN

Active reconnaissance is a type of computer attack in which an intruder engages with the targeted system to gather information about vulnerabilities. This may be through automated scanning or manual testing using various tools like ping, traceroute, netcat etc. This type of recon requires that attacker interact with the target. This recon is faster and more accurate, however it also makes much more noise. Since the attacker have to interact with the target to gain information, there’s an increased chance that the recon will get caught by a firewall or one of the network security devices. (Intrusion Detection Systems, network firewalls, etc.)


How to Connect to a VPN in Windows 10

Note that some VPN providers offer their own desktop clients, which means you won’t need the setup process described in this guide.

Windows 10 supports PPTP, L2TP/IPsec, SSTP, and IKEv2 connections without any third-party software.

To connect to a VPN on Windows 10, head to Settings > Network & Internet > VPN. Click the “Add a VPN connection” button to set up a new VPN connection.


Provide the connection details for your VPN. You can enter any name you like under “Connection Name”. This name is just used on your computer to help you identify the VPN connection.

Your VPN provider should be able to provide you with these details. If the VPN is provided by your employer, your employer’s IT department should provide you with the details you’ll need to connect.

Once you’ve set up a VPN, you’ll see it in the network popup menu next to any nearby Wi-Fi networks.

Click the network name in the popup menu and Windows will open the Settings > Network & Internet > VPN window for you. Select the VPN and click “Connect” to connect to it. You can also configure or remove VPN connections from here.

Dial-ups

How to Connect to a Dial-up in Windows 7

A Dial-up connection is one of the first forms of internet service. This type of connection relies on the use of traditional telephone lines to carry data packets and provide users with access to the web. Although popularly used during the days when the internet was still young, it is currently labeled as an outdated method of connecting to the internet because of its slow data transfer speeds, and its reliance on telephone lines when users access the internet. This means that a home dial-up connection only provides one service at a time and that people in a household with a dial-up connection are unable to use the phone to take calls and browse the internet at the same time.

Dial-up connections are able to provide users with a 56Kbps bandwidth[3], with the 56K modem only becoming available in 1998. Earlier modems ran at significantly slower speeds which, by today’s standards, would not be able to handle the data and media transfers that users need to functionally access a regular website, much less streaming videos on Youtube, viewing images on Instagram and the like.

1) Click the Start button

2) Select Control Panel

3) Select Network and Internet and select Connect to the Internet

4) Select Dial-up

5) In the dialogue box that appears enter the connection details:

Dial-up phone number

User name: (your account ID)

Password: (your NCF password)

Connection name: The default name is Dial-up Connection, but you can identify it as NCF or any other name that you want instead.

6) Allow other people to use this connection: check this if you want other users of your computer who have their own accounts on your PC to have access to the dial-up connection.

Click Connect to dial the connection.

Open your web browser and it should now load your home page, indicating that you are connected to the internet.

After you have set up the connection any time you open your web browser it should automatically dial NCF and connect you to the internet

Wireless

WLAN means wireless local area network.

WLAN is a type of Local Area Network (LAN) that uses high frequency radio waves rather than wires to communicate and transmit data. It is a flexible data communication system implemented as an extension to or as an alternative for, a wired LAN.

A WLAN can be built using any of several different wireless network protocols, most commonly Wi-Fi or Bluetooth.

How to Set-up a wireless router

Step 1: Connect your router to your modem

Don’t plug your router into the power outlet just yet. Instead, the first thing you’re going to do is connect your modem to the WAN port, with an Ethernet cable.

Not sure what the WAN port is? Most consumer routers feature a group of Ethernet ports, several of which are called the LAN ports (local area network) and another called the WAN (wide area network) port. The WAN port looks the same as the LAN ports, but it’s often a different color and spaced apart from them. In the above photo, for instance, the WAN port is yellow and labeled “Internet.” Sometimes it will be labeled “WAN.” This port is intended to connect your router to the modem, and the outside world from there. The LAN ports are intended for connecting to local devices.

Plug one Ethernet cable into your modem, and the other end into your router’s WAN port. Then plug your router’s power adapter into the wall

Step 2: Connect your router to your computer

Connect a computer manually to the router using an Ethernet cable. Once you’re connected, head to your router’s configuration page. This is basically a website hosted on your router, and it’s a traditional way to configure your router’s settings. How to find it can vary, but it almost always means typing 192.168.1.1 into the address bar of your preferred browser, then hitting Enter.

Alternative Method:

Today’s modems can typically be set up by a mobile app that will automatically walk you through the setup process. It’s the most effective method, but you have to make sure you choose the right app.

Instructions for what app to use should be in your manual.

Now connect to your latent Wi-Fi network. This is usually a simple process: Head to the settings on your phone or computer, and choose the Wi-Fi/Network option (Google just has you scan a QR code, so this process can vary a little). Look for your router’s name here: Your router should have a default SSID name that’s printed on the back out of the router, along with the default network key. Use the key to log into the network.

Once connected, launch the router management app to begin the setup!

Step 3: Create a username and password, or find the existing one

For most new routers, you’ll be asked to create an app name (again, this is called an SSID) and password. Make sure this password is unique and secure, because anyone who has it can do all kinds of nasty things to your network.

WPA2 encryption is currently the standard for security and you should always choose it if given an option for your security protocol. Make sure you choose a long password, too, one that is distinct from the admin password you set earlier and ideally doesn’t include words from the dictionary or an easily guessed name (like the name of your pet). Afterwards, store it somewhere secure.

A used router, however, may already have a password and need to be reset. Most routers have a recessed reset button on the back. Holding down the “reset” button with a paperclip for at least 30 seconds will do the trick. Leave the power on, and wait for the router to rest. It should utilize the default settings when it restarts, meaning the default username and password will now grant you access to settings.

Step 3: Continue setting up your router

Set up other settings such as parental controls, automatic updates, and more. You can tweak these settings and more later from the app, but pay attention to the walkthrough and everything it teaches you. You should learn about guest access, monitoring activity, and more. When finished, the app will configure network settings and finish setting up your network. You can now explore the app at leisure to learn more.

Additional information

With these steps out of the way, your router should be ready to use. Go ahead and connect your devices, and enjoy!

Of course, there’s a lot more you can configure, if you dig into the settings. Setting up port forwarding can be useful, and the true power users should consider replacing their firmware with DD-WRT to get access to all kinds of settings that are otherwise not offered. For most users, however, working Wi-Fi and secure access to the administrative backend is a great place to start.

Wired

What is LAN?

A local area network (LAN) consists of a series of computers linked together to form a network in a circumscribed location. The computers in a LAN connect to each other via TCP/IP ethernet. A LAN is normally exclusive to an organization, such as a school, office, association or church.

What is wired LAN?

Wired connections are by far the most common. The main media in use are coaxial cable, twisted pairs and fibre optics. For each of these, specific network technologies or specifications have been designed. The medium must have properties that will ensure a reasonable error performance for a guaranteed distance and rate of date delivery (i.e. speed). It must also support two-way or multiway communications.

WWAN

Wireless WAN is a wide area network in which separate areas of coverage or cells are connected wirelessly to provide service to a large geographic area.

WWAN services are typically delivered to smart phones and other handheld devices sold by cellular service providers and their retail partners but other mobile devices can use them as well. Some netbooks are available with WWAN cards installed; you can also purchase wireless WAN cards to install yourself. Unlike Wi-Fi cards, which can be used in just about any hotspot, WWAN devices must be provisioned specifically for access to your service provider’s network. Your service provider will take care of billing for roaming access that involves other provider networks.

The three families of WWAN technologies are GSM/UMTS, CDMA One/CDMA2000 and WiMAX. In the United States, service providers include AT&T, Clearwire, Sprint and Verizon. Wireless WAN services are expected to become increasingly available as 4G technologies mature.

A+ certification develops PC hardware and software troubleshooting skills. Professionals in the information technology industry may find A+ certification to be an advantage when searching for jobs. Technicians that have the certification tend to earn 5 to 15 percent more than those that don’t. Some employers require A+ certification for entry-level technical support positions. IT professionals that obtain the certification pursue many career paths, such as technical support specialist and IT support administrator.https://asmed.com/course/comptia-a-boot-camp/

Posted by & filed under CompTIA Security+, MICROSOFT MTA SECURITY.

Load Balancing

CompTIA Security+|MTA Security – Load Balancing

CompTIA Security+ Section 2.0


Load Balancer
Definition: “Load balancing is defined as the methodical and efficient distribution of network or application traffic across multiple servers in a server farm.”

A load balancer works in-between client devices and back end servers, and it receives then distributes incoming requests to any available server capable of fulfilling them. It can be either physical hardware, a virtualized instance running on specialized hardware or a software process.

Scheduling:

   Affinity – “an affinity means that the load balancer will always use the same server for a particular user or a particular application instance.”

   Round-Robin – “One type of scheduling is called round-robin scheduling where each server is selected in turn. And if round-robin scheduling is set for 1 to 1, then the first bit of traffic will go to Server A. The second bit of traffic through the load balance will be scheduled to Server B. The third type of traffic through the load balancer will be scheduled to Server C. And because this load balancer is scheduling in a round-robin method, the last bit will go to Server D.”

Active – Passive: “Some load balancers can be configured for active/passive load balancing. That means that some servers will be currently active and able to take requests, and other servers are on standby.”

Active – Active: “That means that all of these servers are active. And requests coming through the load balancer could use any of these active servers at any time.” If any server fails, then “the load balancer will identify the failure and begin using one of the standby servers in its place.”


Why is it necessary?

“An ADC with load balancing capabilities helps IT departments ensure scalability and availability of services. Its advanced traffic management functionality can help a business steer requests more efficiently to the correct resources for each end user. An ADC offers many other functions (for example, encryption, authentication and web application firewalling) that can provide a single point of control for securing, managing and monitoring the many applications and services across environments and ensuring the best end-user experience.”


Are you looking to break into the exciting field of Cybersecurity? Join our 5-day CompTIA Security+ Bootcamp and build your cybersecurity knowledge and skills.

OR

Become a certified ethical hacker! Our 5-day CEH Bootcamp is unlike other strictly theoretical training, you will be immersed in interactive sessions with hands-on labs after each topic. You can explore your newly gained knowledge right away in your classroom by pentesting, hacking and securing your own systems. Learn more

Posted by & filed under CompTIA Security+, MICROSOFT MTA SECURITY.

Penetration Testing Concepts 1

Active Vs Passive Reconnaissance

CompTIA Sec+ Section 1.4

Active Reconnaissance

Active reconnaissance is a type of computer attack in which an intruder engages with the targeted system to gather information about vulnerabilities. This may be through automated scanning or manual testing using various tools like ping, traceroute, netcat etc. This type of recon requires that attacker interact with the target. This recon is faster and more accurate, however it also makes much more noise. Since the attacker have to interact with the target to gain information, there’s an increased chance that the recon will get caught by a firewall or one of the network security devices. (Intrusion Detection Systems, network firewalls, etc.)

Tools and Techniques Used

In order to gather information from the target host, attacker normally use port scanning techniques.

Nmap is probably the most well-known tool for active network reconnaissance. Nmap is a network scanner designed to determine details about a system and the programs running on it. This is accomplished through the use of a suite of different scan types that take advantage of the details of how a system or service operates. By launching scans against a system or a range of IP addresses under a target’s control, a hacker can learn a significant amount of information about the target network.

Metasploit is primarily designed as an exploitation toolkit. It contains a variety of different modules that have prepackaged exploits for a number of vulnerabilities. With Metasploit, even a novice hacker has the potential to break into a wide range of vulnerable machines.

Although it was designed as an exploit toolkit, Metasploit can also be effectively used for reconnaissance. At the minimum, using the autopwn option on Metasploit allows a hacker to try to exploit a target using any means necessary. More targeted analysis can allow a hacker to perform reconnaissance using Metasploit with more subtlety.

Port Scanning

Port Scanning is a systematically scanning computer ports as whole information is going in and out is through portand port scanning identifies open ports to a computer.Through port scanning attacker infer which services are visible and where attack is possible. Basic principal of port scanning is that to retrieve data from the opened port and analyze it.


Passive Reconnaissance

Passive reconnaissance is an attempt to gain information about targeted computers and networks without actively engaging with the systems. It is a gathering the information without alerting victim. If the victim host alerted then it drastically increases security against the attack.

Tools and Techniques Used

Wireshark is best known as a network traffic analysis tool, but it can also be invaluable for passive network reconnaissance. If an attacker can gain access to an organization’s Wi-Fi network or otherwise eavesdrop on the network traffic of an employee (e.g., by eavesdropping on traffic in a coffee shop), analyzing it in Wireshark can provide a great deal of useful intelligence about the target network.

Shodan is a search engine for internet-connected devices. As the Internet of Things grows, individuals and organizations increasingly are connecting insecure devices to the internet.

Using Shodan, a hacker may be able to find devices within the IP address range belonging to a company, indicating that they have the device deployed on their network. Since many IoT devices are vulnerable by default, identifying one or more on the network may give a hacker a good starting point for a future attack.

OS Fingerprinting

OS Fingerprinting is a method for determining which operating system does the remote computer runs.OS Fingerprinting is mostly used for cyber reconnaissance as most exploitable vulnerabilities are operating system specific.


COUNTERMEASURES

There is a remarkable research work done to detect cyber attack at reconnaissance phase. Reconnaissance is a primary and starting phase of any cyber attack so if any solution for detecting cyber reconnaissance can be a good achievement in the course development of effective early warning system.Cyber attack is sequence of reconnaissance, infiltration and conclusion phase. A layered protection is always best but defense strategies for different network will be different. Stateful firewall, Intrusion Detection System, Intrusion Prevention System and NAT are preferable solutions. Firewall should be configured to allow only necessary traffic and also configured to log multiple connections from the same IP address. This implementation assures block scans such as FIN, NULL, XMAS and detect SYN scan as firewall is stateful. Snort like tool should be used which work as IDS that monitors traffic and detect anomalous activity. Snort should be configured to detect multiple connection from the same IP address. Using NAT is a good practice as it will put only single IP visible and block OS fingerprinting attempts. Apply all latest patches to block vulnerable points.

Are you looking to break into the exciting field of Cybersecurity? Join our 5-day CompTIA Security+ Bootcamp and build your cybersecurity knowledge and skills.

OR

Become a certified ethical hacker! Our 5-day CEH Bootcamp is unlike other strictly theoretical training, you will be immersed in interactive sessions with hands-on labs after each topic. You can explore your newly gained knowledge right away in your classroom by pentesting, hacking and securing your own systems. Learn more

Posted by & filed under Amazon AWS.

How to Install Python on Amazon Linux Server

In technical terms, Python is an object-oriented, high-level programming language with integrated dynamic semantics primarily for web and app development. It is extremely attractive in the field of Rapid Application Development because it offers dynamic typing and dynamic binding options. Python is relatively simple, so it’s easy to learn since it requires a unique syntax that focuses on readability.

At the writing time of this article Python 3.7.4 (in Python 3.7 series) latest stable version is available to download and install. This tutorial will help you to install Python 3.7.4 on Amazon Linux systems.

Step 1 - Install the GCC Compiler

Login to your server using ssh or shell access. Now, use the following command to install prerequisites for Python before installing it.

$ yum install gcc openssl-devel bzip2-devel libffi-devel

Step 2 - Download Python

Download Python using the following command from the Python official site. You can also download the latest version in place of specified below.

$ cd /opt
$ sudo wget https://www.python.org/ftp/python/3.7.4/Python-3.7.4.tgz

Now extract the downloaded package.

$ sudo tar xzf Python-3.7.4.tgz

Step 3 - Install Python

Use below set of commands to compile Python source code on your system using alt-install.

$ cd Python-3.7.4
$ sudo ./configure –enable-optimizations
$ sudo make altinstall

make altinstall is used to prevent replacing the default python binary file /usr/bin/python.

Now remove downloaded source archive file from your system

$ sudo rm /usr/src/Python-3.7.4.tgz

Step 4 - Check Python Version

Check if python installed correctly by checking its version. Use command python3.7 instead of python. The new binary will be installed at /usr/local/bin/python3.7 location:

$ python3.7 -V

Posted by & filed under Amazon AWS.

How to backup an EC2 instance through Lambda

Amazon AWS EBS Backup via Lambda and CloudWatch

The goal is to backup the EBS volume via AWS lambda and CloudWatch , we will do it two way ; One will be done in 1 Min interval ( using the Lambda function and another one using the Cloudwatch with 5 mins Interval)

Step 1) Right Now I have two EC2 machines and I have two Volume on the left side .

Step 2) When I go to snapshot on the left side I do not see anything

Step 3) In order to create a function ; I need to create a Role and in order to create a Role I need to create a Policy

Step 4) Go to IAM and on left side click create a policy and then click Jason and copy and paste this code in here ( we will see what these code do inside the Lambda )

Step 5)

{

    “Version”: “2012-10-17”,

    “Statement”: [

        {

            “Action”: [

                “cloudwatch:DeleteAlarms”,

                “cloudwatch:DescribeAlarmHistory”,

                “cloudwatch:DescribeAlarms”,

                “cloudwatch:DescribeAlarmsForMetric”,

                “cloudwatch:GetMetricStatistics”,

                “cloudwatch:ListMetrics”,

                “cloudwatch:PutMetricAlarm”,

                “ec2:CreateSnapshot”,

                “ec2:ModifySnapshotAttribute”,

                “ec2:ResetSnapshotAttribute”,

                “ec2:Describe*”,

                “logs:CreateLogGroup”,

                “logs:CreateLogStream”,

                “logs:PutLogEvents”,

                “iam:GetRole”,

                “iam:ListRoles”,

                “lambda:*”

            ],

            “Resource”: “*”,

            “Effect”: “Allow”

        }

    ]

}

Step 6) Click Review Policy and give name BackupEC2policy

Step 7) Go to Role on the left side and then Pick Lambda , click next for Permission ; then search for above policy you created ; go to next page ( no Tag) then click Review and then give name BackupEC2Role

Step 8) Now we will go to Lambda and use above Role

Step 9) Give the name BackupEC2 ; chose Runtime Python 3.6 ;then pick chose exiting Role; the chose BackupEC2Roles , then Create a function

Step 10) On next page we will see on the right side what is shown ( this come from Policy that we created before)

Step 11) Now I will go copy and paste the Function code inside it and make sure save it

import json

import boto3

# Setting ec2 client.

ec2 = boto3.client(‘ec2’)

# Our lambda handler function!

def lambda_handler(event, context):

    # Printing event received.

    # print(“Received event: ” + json.dumps(event, indent=2))

    # Let’s go ahead and print the rule arn to the logs so we know they are different!

    rule_name = event[‘resources’]

    print(rule_name)

    # Setting the variable to loop through later.

    # Filtering by only looking for ‘in-use’ EBS volumes.

    total_ebs = ec2.describe_volumes(Filters=[{‘Name’: ‘status’, ‘Values’: [‘in-use’]}])

    # Looping through and collecting all EBS volumes.

    for volume in total_ebs[‘Volumes’]:

     # Creating the snaphsot for all volumes within our region.

        ec2.create_snapshot(VolumeId=volume[‘VolumeId’],Description=volume[‘Attachments’][0][‘InstanceId’])

        print(“All done with volume: ” + volume[‘VolumeId’])

Step 12) On the left side you will see the triggers ; in order to the Triggers I will go to CloudWatch first ( later on I will do another way) then   click on rule on the left side .

Step 13)  click on Rule ; then Click create a Rule

Step 14 )  Click the Schedule ; then choose 5 mins , then click on the Lambda function ; then pick backupEC2 , then give Name BackupEC25mins ; and

Step 15) Now go back to your Lambda function ; and then on the left side you will see the CloudWatch as one of the tigers .


Step 16) When you click on it , you will see 5 mins interval.

Step 17 ) Now when I go to Snapshot ; I will see about 4 ( if it was more than 5 mins) , Now I will disable this Triggers and I will delete the Snapshot ; then I will configure the Triger within inside of the Lambda Functions.

Step 18) Also when you go to Lambda function at Bottom; you will see two invocations 


Step 19) Now  I will create a Trigger inside the Lambda   and I will pick Cloud Watch ;then click rule ; ( as we see we have the rule from last steps) then Click new Rule ; and , give rule name 

BackupEC2_1mins , then give description “ This will back up every one min.” , click schedule expression , then type “rate(1 minute)

Step 20) Now make sure it is enable and click Add 

Step 21) Now you will see number two next to CloudWatch Events , You will see one enable and one is disable

Step 22) after one more min, when you go back to snapshot; you should see the snapshot of the volume,

Step 23) now if you go to CloudWatch you should see new events in here too.

Step 24) now when you go to CloudWatch ; then you will see all the logs and all the events that has been created.

Step 25) make sure disable the Tigger (cloud watch) and delete all the EBS volume.


AWS Certified Solutions Architect – Associate is a category of technical certifications offered by Amazon Web Services (AWS) for beginners and professionals who run enterprise architecture programs, as well as solutions architects. It covers deployment of AWS systems, AWS best practices, and many other topics.

the AWS Course covers skills for working with the Amazon Cloud, Alexa, Amazon S3, Amazon EC2, autoscaling and load balancing, serverless websites and many more.

Our next 5-day bootcamp will start soon!


Posted by & filed under CompTIA A+.

32-bit VS 64-bit

CompTIA A+ Objective 1.1

The terms “32-bit” and “64-bit” are commonly seen in system requirements and other technical literature, but few people actually know what these terms mean. Do they refer to hardware or software specifications?

Up until 2006, all Windows operating systems have been written using 32-bit architecture. 32-bits is simply the “width” of the data bus (think of it as lanes on a highway). As computer hardware technology has progressed, the need for faster and more efficient data-handling capabilities are quickly becoming a necessity. And as a result of these increasing requirements came new hardware and software architecture for managing these advancements, the 64-Bit processor and 64-Bit operating system. While 64-Bit technology is really nothing new, for most everyday users it has never been practical. Now that costs have been reduced for the necessary hardware, 64-Bit operating system use is on the rise.

In Windows, you can see if you have a 32 Bit or 64-Bit operating system by going to the control panel and opening the system icon or use the Windows Key + Pause Hotkey

32 Bit Operating Systems

Only a few of the computers operating in the world today use an operating system that utilizes 32-bit memory management architecture (Data bus). These are commonly referred to as X86 systems (this is in reference to the first 32 bit 286\386\486 systems). There are few remaining 32-bit operating systems on the market today. Here are a few examples:

♦ Microsoft Windows: These include Windows 95, 98, NT, 2000, XP, Vista, and Server
♦ Linux: These include Red Hat, Mandrake, and Ubuntu
♦ Solaris: Versions 1-10
♦ Mac OS: Classic (84-2001) and OS X
♦ FreeBSD: Versions 1-8

64 Bit Operating Systems

In 2002, Linux and Microsoft released the first commercial 64-bit operating systems. Linux release Red Hat 7.1 and Microsoft introduced Windows XP 64-Bit Edition. These were first used by server administrators and for users with high-end software, such as rendering applications. As larger data stores, such as 4.7 GB DVD’s, needed to be accessed more efficiently, these 64-bit operating systems are being offered to the consumer user as well. In 2016, 64-Bit operating systems are the standard.

The Difference

The main difference between 32-bit and 64-bit operating systems is the way that they manage memory. For example, Windows XP 32-bit is limited to a total of 4 GB maximum of system memory to be allocated by the kernel and applications (this is why systems with 4 GB of RAM do not show the total system memory in Windows. Kernel = 1 GB reserved, Applications = 3 GBs-viewable). Windows 64-Bit has a limit of 16 Terabytes maximum of system memory allocation. This is extremely important for performance because data in memory is accessed thousands of times faster than from a disk drive. Programs also load much faster into memory. There is also a better security in XP 64-Bit because it is written from Server 2003 SP1 code base. Users of modeling, statistical, and rendering software really benefit from the 64-Bit architecture because these programs are usually very processor and memory intensive.

While it is possible to install a 32-bit operating system on a 64-bit system, it is best to install a 64-bit version if possible. The 64-bit OS will allow your computer to access more RAM, run applications more efficiently, and, in most cases, run both 32-bit and 64-bit programs.

Exceptions to this rule include system utilities and antivirus programs that are written specifically for a 32 or 64-bit operating system. In these cases, you will need to install the version of the software that corresponds to your OS (which may be different than your hardware). Additionally, device drivers are often written for specific operating systems, so it is important to install 32-bit drivers if you are running a 32-bit OS and 64-bit drivers if your operating system is 64-bit.

Here are some other possible obstacles of using a 32-Bit operating system:

Applications: Just like any legacy technology, vendors no longer develop applications for 32-Bit operating systems.

Hardware: The many processors require a 64-Bit operating system.

Drivers: Manufacturers often do not offer 32-Bit driver versions for their hardware due to a lack of market demand or their product.

Summary

Hopefully the above explanation has given you a better understanding of what 32-bit and 64-bit mean in reference to hardware and software. If you’re installing an operating system, it’s important to know what type of processor your computer has so you can install the right one. If you are installing software, it’s important to know what type of operating system your computer is running, so you can install the correct version.

Most PCs today are 64-bit. However, if you have a 32-bit computer, you have no choice but to install a 32-bit OS. If you have a 64-bit system but have some mission critical peripherals that do not have 64-bit drivers, installing a 32-bit OS might be your best option. In all other cases, it is best to buy 64-bit hardware, install a 64-bit operating system, and run 64-bit applications. This combination will provide the best possible performance.

A+ certification develops PC hardware and software troubleshooting skills. Professionals in the information technology industry may find A+ certification to be an advantage when searching for jobs. Technicians that have the certification tend to earn 5 to 15 percent more than those that don’t. Some employers require A+ certification for entry-level technical support positions. IT professionals that obtain the certification pursue many career paths, such as technical support specialist and IT support administrator.

Posted by & filed under CompTIA A+, CompTIA Security+, MICROSOFT MTA O/S, MICROSOFT MTA SECURITY.

Basic Command Line Tools

CompTIA Security+ Objectives 2.2 –  CompTIA A+ Objectives Core 2 – 1.4

Ping

Ping is a command used to measure the latency between two devices on a network. The ping command is available on every operating systems and is a measure of the latency we feel in everything we do online, whether it’s clicking a link, posting a status update, sending a message, playing a game, uploading a file, streaming an online video, or anything else. If you’re using a website and it takes a long time to load a new page every time you click a link, you’re probably experiencing a high ping to that site. If it’s fast, you probably have a low ping.

Netstat

Netstat — derived from the words network and statistics — is a program that’s controlled via commands issued in the command line. It delivers basic statistics on all network activities and informs users on which portsand addresses the corresponding connections (TCP, UDP) are running and which ports are open for tasks.

In Windows operating systems, you can use the netstat services via the command line (cmd.exe). You can find them in the start menu under “All Programs” -> “Accessories” -> “Command Prompt”. Alternatively, you can search directly for “Command Prompt” in the start menu’s search field or start the command line via “Run” (Windows key + press “R” and enter “cmd”).

Tracert

The tracert command is a Command Prompt command that’s used to show several details about the path that a packet takes from the computer or device you’re on to whatever destination you specify.

You might also sometimes see the tracert command referred to as the trace route command or traceroute command.

Traceroute is a useful tool for determining the response delays and routing loops present in a network pathway across packet switched nodes. It also helps to locate any points of failure encountered while en route to a certain destination.

To run traceroute on Windows:

Open the command prompt.
>>Go to Start > Run.
>>Type cmd and press the Enter key.
>> In the command prompt, type:
tracert hostname
where hostname is the name of the server connection you are testing.

Nslookup/Dig

NsLookup/Dig (Microsoft Windows uses nslookup, while Mac OS X and Linux use dig.)  is a tool included in many operating systems that can look up IP addresses and perform other searches on DNS domains and servers. This resource is housed in a utility called nslookup.exe. NsLookup is a basic way to get fundamental DNS information quickly and easily.

nslookup/Dig is used to troubleshoot server connections or for security reasons. Such reasons include guard against phishing attacks, in which a domain name is altered — for example, by substituting the numeral 1 for a lowercase l — to make an unfriendly site look friendly and familiar (joes1owerprices.com vs. joeslowerprices.com).

DNS, or nslookup, also helps deter cache poisoning, in which data is distributed to caching resolvers, posing as an authoritative origin server.

ARP

ARP (Address Resolution Protocol) is a network protocol used to find out the hardware (MAC) address of a device from an IP address. It is used when a device wants to communicate with some other device on a local network (for example on an Ethernet network that requires physical addresses to be known before sending packets). The sending device uses ARP to translate IP addresses to MAC addresses. The device sends an ARP request message containing the IP address of the receiving device. All devices on a local network segment see the message, but only the device that has that IP address responds with the ARP reply message containing its MAC address. The sending device now has enough information to send the packet to the receiving device.

ipconfig

Internet Protocol Configuration (ipconfig) is a Windows console application that has the ability to gather all data regarding current Transmission Control Protocol/Internet Protocol (TCP/IP) configuration values and then display this data on a screen. Ipconfig also refreshes the Domain Name System (DNS) and Dynamic Host Configuration Protocol (DHCP) settings each time it is invoked. When invoked without additional parameters, ipconfig simply displays the IP address, default gateway and subnet mask for all available adapters.

Tcpdump

Tcpdump is a command line utility that allows you to capture and analyze network traffic going through your system. It is often used to help troubleshoot network issues, as well as a security tool.

A powerful and versatile tool that includes many options and filters, tcpdump can be used in a variety of cases. Since it’s a command line tool, it is ideal to run in remote servers or devices for which a GUI is not available, to collect data that can be analyzed later. It can also be launched in the background or as a scheduled job using tools like cron.

Nmap

Network Mapped (Nmap) is a network scanning and host detection tool that is very useful during several steps of penetration testing. Nmap is not limited to merely gathering information and enumeration, but it is also powerful utility that can be used as a vulnerability detector or a security scanner. So Nmap is a multipurpose tool, and it can be run on many different operating systems including Windows, Linux, BSD, and Mac. Nmap is a very powerful utility that can be used to:

  • Detect the live host on the network (host discovery)
  • Detect the open ports on the host (port discovery or enumeration)
  • Detect the software and the version to the respective port (service discovery)
  • Detect the operating system, hardware address, and the software version
  • Detect the vulnerability and security holes (Nmap scripts)

Netcat

Netcat is a featured networking utility which reads and writes data across network connections, using the TCP/IP protocol.
It is designed to be a reliable “back-end” tool that can be used directly or easily driven by other programs and scripts. At the same time, it is a feature-rich network debugging and exploration tool, since it can create almost any kind of connection you would need and has several interesting built-in capabilities.

It provides access to the following main features:

1) Outbound and inbound connections, TCP or UDP, to or from any ports.
2) Featured tunneling mode which allows also special tunneling such as UDP to TCP, with the possibility of specifying all network parameters (source port/interface, listening port/interface, and the remote host allowed to connect to the tunnel.
3) Built-in port-scanning capabilities, with randomizer.
4) Advanced usage options, such as buffered send-mode (one line every N seconds), and hexdump (to stderr or to a specified file) of trasmitted and received data.
5) Optional RFC854 telnet codes parser and responder.


Are you looking to break into the exciting field of cybersecurity? Join our 5-day CompTIA Security+ Bootcamp Training and build your cybersecurity knowledge and skills. 

Or

Become a certified ethical hacker! Our 5-day CEH Bootcamp is unlike other strictly theoretical training, you will be immersed in interactive sessions with hands-on labs after each topic. You can explore your newly gained knowledge right away in your classroom by pentesting, hacking and securing your own systems. Learn more

Posted by & filed under CompTIA Security+.

Ransomware

CompTIA Sec+ Objectives 1.1

Ransomware is a type of malicious software that infects a computer and restricts users’ access to it until a ransom is paid to unlock it. Ransomware variants have been observed for several years and often attempt to extort money from victims by displaying an on-screen alert. Typically, these alerts state that the user’s systems have been locked or that the user’s files have been encrypted. Users are told that unless a ransom is paid, access will not be restored.

Ransomware

How does a computer become infected with Ransomware?

Ransomware (and other malware) is very often spread via email (phishing). Targeting is very straightforward using email as an attack vector since a domain name is a great identifier. The hacker then makes it clear that the information is stolen and offers to give that information back if the victim pays a ransom.
Victims are often asked to pay the ransom in the form of Bitcoins. If the ransom is paid, the cybercriminals may unlock the data or send a key to for the encrypted files.

Drive-by downloading occurs when a user unknowingly visits an infected website and then malware is downloaded and installed without the user’s knowledge.

Crypto ransomware, a malware variant that encrypts files, is spread through similar methods and has also been spread through social media, such as Web-based instant messaging applications. Additionally, newer methods of ransomware infection have been observed. For example, vulnerable Web servers have been exploited as an entry point to gain access to an organization’s network.

Why is Ransomware so effective?

The authors of ransomware instill fear and panic into their victims, causing them to click on a link or pay a ransom, and users systems can become infected with additional malware. Ransomware displays intimidating messages similar to those below:

  • “Your computer has been infected with a virus. Click here to resolve the issue.”
  • “Your computer was used to visit websites with illegal content. To unlock your computer, you must pay a $100 fine.”
  • “All files on your computer have been encrypted. You must pay this ransom within 72 hours to regain access to your data.”

Why is Ransomware spreading?

Ransomware attacks and their variants are rapidly evolving to counter preventive technologies for several reasons:

  • 1) Easy availability of malware kits that can be used to create new malware samples on demand
  • 2) Use of known good generic interpreters to create cross-platform ransomware (e.g., Ransom32 uses Node.js with a JavaScript payload)
  • 3) Use of new techniques, such as encrypting the complete disk instead of selected files

Additionally, today’s thieves don’t even have to be tech savvy. Ransomware marketplaces have sprouted up online, offering malware strains for any would-be cybercrook and generating extra profit for the malware authors, who often ask for a cut in the ransom proceeds.

Examples of Ransomware attacks​

wannacry

CryptoLocker Ransomware Attack

CyptoLocker botnet is one of the oldest forms of cyber attacks which has been around for the past two decades. The CyptoLocker ransomware came into existence in 2013 when hackers used the original CryptoLocker botnet approach in ransomware.

CyptoLocker ransomware is the most destructive form of ransomware since it uses strong encryption algorithms. It is often impossible to decrypt (restore) the Crypto ransomware-infected computer and files without paying the ransom.

WannaCry Ransomware Attack 

WannaCry is the most widely known ransomware variant across the globe. The WannaCry ransomware attack has affected nearly 125,000 organizations in over 150 countries. Some of the alternative names given to the WannaCry ransomware are WCry or WanaCrypt0r.

Cerber Ransomware Attack

Cerber ransomware attacks targeted cloud-based Office 365 users. Millions of Office 365 users have fallen prey to an elaborate phishing campaign carried out by the Cerber ransomware

CryptoWall Ransomware Attack

CryptoWall is an advanced form of CryptoLocker ransomware. It came into existence since early 2014 after the downfall of the original CryptoLocker variant. Today, there are multiple variants of CryptoWall in existence. It includes CryptoDefense, CryptoBit, CryptoWall 2.0, and CryptoWall 3.0.

Locky Ransomware Attack

Locky is another ransomware variant which is designed to lock the victim’s computer and prevent them from using it until a ransom is paid. It usually spread through a seemingly benign email message disguised as an invoice.

GoldenEye Ransomware Attack

GoldenEye is similar to the infamous Petya ransomware. It spreads through a massive social engineering campaign that targets human resources departments. When a user downloads a GoldenEye-infected file, it silently launches a macro which encrypts files on the victim’s computer.

Jigsaw Ransomware Attack

Jigsaw is one of the most destructive types of ransomware attacks, because it encrypts and progressively deletes the encrypted files until a ransom is paid. It starts deleting the files one after the other on an hourly basis until the 72-hour mark- when all the remaining files are deleted.

When a user opens the email attachment, the invoice gets deleted automatically, and the victim is directed to enable macros to read the document. When the victim enables macros, it begins encrypting multiple file types using AES encryption.

Apart from the list of ransomware mentioned above, Petya, NotPetya, TeslaCrypt, TorrentLocker, ZCryptor, etc., are some of the other ransomware variants that are well-known for their malicious activities.


How to defend against ransomware?

Infections can be devastating to an individual or organization, and recovery can be a difficult process that may require the services of a reputable data recovery specialist.

US-CERT recommends that users and administrators take the following preventive measures to protect their computer networks from ransomware infection:

1) Employ a data backup and recovery plan for all critical information. Perform and test regular backups to limit the impact of data or system loss and to expedite the recovery process. Note that network-connected backups can also be affected by ransomware; critical backups should be isolated from the network for optimum protection.

2) Keep your operating system and software up-to-date with the latest patches. Vulnerable applications and operating systems are the targets of most attacks. Ensuring these are patched with the latest updates greatly reduces the number of exploitable entry points available to an attacker.

3) Maintain up-to-date anti-virus software, and scan all software downloaded from the internet prior to executing.

4) Restrict users’ ability (permissions) to install and run unwanted software applications, and apply the principle of “Least Privilege” to all systems and services. Restricting these privileges may prevent malware from running or limit its capability to spread through the network.

5) Avoid enabling macros from email attachments. If a user opens the attachment and enables macros, embedded code will execute the malware on the machine.

6) Do not follow unsolicited Web links in emails. Refer to the Phishing resources found on this website for more information.

I’m A Ransomware Victim What should I do?

Keep in mind that paying a ransom is no guarantee of receiving a decryption key.

“ASM advises that you never pay a ransom”

If you or your company have been a victim of ransomware you should report it immediately to CISA at www.us-cert.gov/report, a local FBI Field Office, or Secret Service Field Office.

Another good source of information if you have been a victim of ransomware and help you on unlocking some ransomware threats is to visit No More Ransom. If your device gets held for ransom, start by researching what type of ransomware it is. Then check out No More Ransom’s decryption tools and see if one is available for your ransomware.

Are you looking to break into the exciting field of Cybersecurity? Join our 5-day CompTIA Security+ Bootcamp and build your cybersecurity knowledge and skills.

OR

Become a certified ethical hacker! Our 5-day CEH Bootcamp is unlike other strictly theoretical training, you will be immersed in interactive sessions with hands-on labs after each topic. You can explore your newly gained knowledge right away in your classroom by pentesting, hacking and securing your own systems. Learn more

Posted by & filed under CompTIA A+, CompTIA Network+.

Comparison of IPv4 and IPv6

Basic Comparison

Description

IPv4

IPv6

Address

32 bits long (4 bytes). Address is composed of a network and a host portion, which depend on address class. Various address classes are defined: A, B, C, D, or E depending on initial few bits. The total number of IPv4 addresses is 4 294 967 296. The text form of the IPv4 address is nnn.nnn.nnn.nnn, where 0<=nnn<=255, and each n is a decimal digit. Leading zeros can be omitted. Maximum number of print characters is 15, not counting a mask.

128 bits long (16 bytes). Basic architecture is 64 bits for the network number and 64 bits for the host number. Often, the host portion of an IPv6 address (or part of it) will be derived from a MAC address or other interface identifier.

Depending on the subnet prefix, IPv6 has a more complicated architecture than IPv4.

The number of IPv6 addresses is 1028 (79 228 162 514 264 337 593 543 950 336) times larger than the number of IPv4 addresses. The text form of the IPv6 address is xxxx:xxxx:xxxx:xxxx:xxxx:xxxx:xxxx:xxxx, where each x is a hexadecimal digit, representing 4 bits. Leading zeros can be omitted. The double colon (::) can be used once in the text form of an address to designate any number of 0 bits. For example, ::ffff:10.120.78.40 is an IPv4-mapped IPv6 address.

Address allocation

Originally, addresses were allocated by network class. As address space is depleted, smaller allocations using Classless Inter-Domain Routing (CIDR) are made. Allocation has not been balanced among institutions and nations.

Allocation is in the earliest stages. The Internet Engineering Task Force (IETF) and Internet Architecture Board (IAB) have recommended that essentially every organization, home, or entity be allocated a /48 subnet prefix length. This will leave 16 bits for the organization to do subnetting. The address space is large enough to give every person in the world their own /48 subnet prefix length.

Address mask

Used to designate network from host portion.

Not used

Configuration

You must configure a newly installed system before it can communicate with other systems; that is, IP addresses and routes must be assigned.

Configuration is optional, depending on functions required. IPv6 can be used with any Ethernet adapter and can be run over the loopback interface. IPv6 interfaces are self-configuring using IPv6 stateless autoconfiguration. You can also manually configure the IPv6 interface. So, the system will be able to communicate with other IPv6 systems that are local and remote, depending on the type of network and whether an IPv6 router exists.

Domain Name System (DNS)

Applications accept host names and then use DNS to get an IP address, using socket API gethostbyname().

Applications also accept IP addresses and then use DNS to get host names using gethostbyaddr().


For IPv4, the domain for reverse lookups is in-addr.arpa.

Same support for IPv6. Support for IPv6 exists using AAAA (quad A) record type and reverse lookup (IP-to-name). An application may elect to accept IPv6 addresses from DNS (or not) and then use IPv6 to communicate (or not).

The socket API gethostbyname() only supports IPv4. For IPv6, a new getaddrinfo() API is used to obtain (at application choice) IPv6 only, or IPv4 and IPv6 addresses.


For IPv6, the domain used for reverse lookups is ip6.arpa, and if they are not found then ip6.int is used.

Dynamic Host Configuration Protocol (DHCP)

DHCP is used to dynamically obtain an IP address and other configuration information. IBM i supports a DHCP server for IPv4.

ISC DHCP server implementation can be used.

Host table

A configurable table that associates an Internet address with a host name (for example, 127.0.0.1 for loopback). This table is used by the sockets name resolver, either before a DNS lookup or after a DNS lookup fails (determined by host name search priority).

Same support for IPv6.

Internet Control Message Protocol (ICMP)

Used by IPv4 to communicate network information.

Used similarly by IPv6; however, Internet Control Message Protocol version 6 (ICMPv6) provides some new attributes.

Basic error types remain, such as destination unreachable, echo request and reply. New types and codes are added to support neighbor discovery and related functions.

IP header

Variable length of 20-60 bytes, depending on IP options present.

Fixed length of 40 bytes. There are no IP header options. Generally, the IPv6 header is simpler than the IPv4 header.

LAN connection

LAN connection is used by an IP interface to get to the physical network. Many types exist; for example, Ethernet. Sometimes it is referred to as the physical interface, link, or line.

IPv6 can be used with any Ethernet adapters and is also supported over virtual Ethernet between logical partitions.

Loopback address

A loopback address is an interface with an address of 127.*.*.* (typically 127.0.0.1) that can only be used by a node to send packets to itself. The physical interface (line description) is named *LOOPBACK.

The concept is the same as in IPv4. The single loopback address is 0000:0000:0000:0000:0000:0000:0000:0001 or ::1 (shortened version). The virtual physical interface is named *LOOPBACK.

PING

PING is a basic TCP/IP tool to test reachability. Available using IBM Navigator for i and the character-based interface.

Same support for IPv6.

Source: IBM

Becoming Network+ certified is a distinctive step towards a career in networking or telecommunications.
Network+ is a vendor neutral certification that proves an IT professional’s expertise in managing, maintaining, troubleshooting, installing and configuring basic computer networks.

Learn more about our program: Network+

Posted by & filed under CompTIA Network+, CompTIA Security+.

Two-Factor or Multi-Factor Authentication (2FA or MFA)

CompTIA Security+ Objective 4.1 and CompTIA Network+ Objective 4.2

What is two-factor or multi-factor authentication (2FA or MFA)?

Multifactor authentication ensures that a user is who they say they are. The more factors are used to determine the identity of a person, the greater the reliability of the authenticity.

Typical MFA scenarios include:

1) Swiping a card and entering a PIN.
2) Logging into a website and being requested to enter an additional one-time password (OTP) that the website’s authentication server sends to the requester’s phone or email address.
3) Downloading a VPN client with a valid digital certificate and logging into the VPN before being granted access to a network.
4) Swiping a card, scanning a fingerprint and answering a security question.
5) Attaching a USB hardware token to a desktop that generates a one-time passcode and using the one-time passcode to log into a VPN client.

Background

One of the largest problems with traditional user ID and password login is the need to maintain a password database. Whether encrypted or not, if the database is captured it provides an attacker with a source to verify his guesses at speeds limited only by his hardware resources. Given enough time, a captured password database will fall.

As processing speeds of CPUs have increased, brute force attacks have become a real threat. Further developments like GPGPU password cracking, rainbow tables and now the Quantum computers have provided greater advantages for the attackers. GPGPU cracking, for example, can produce more than 500,000,000 passwords per second, even on lower end gaming hardware. Depending on the particular software, rainbow tables can be used to crack 14-character alphanumeric passwords in about 160 seconds. Recently, a paper released by Google’s researchers that was briefly posted on a Nasa’s website before being removed, claimed that their processor was able to perform a calculation in three minutes and 20 seconds that would take today’s most advanced classical computer, known as Summit, approximately 10,000 years. With these capabilities, a password database alone doesn’t stand a chance against such methods when it is a real target of interest.

In the past, MFA systems typically relied upon two-factor authentication. Increasingly, vendors are using the label “multifactor” to describe any authentication scheme that requires more than one identity credential.

Authentication factors

An authentication factor is a category of credential used for identity verification. For MFA, each additional factor is intended to increase the assurance that an entity involved in some kind of communication or requesting access to some system is who, or what, they are declared to be. The five most common categories are often described as something you know (the knowledge factor), something you have (the possession factor), something you are (the inherence factor), somewhere you are (location factor) and something you do (Time factors).

Something you know (The knowledge factor)

Accessing any account requires credentials by registering a unique username and password. Cellphone PINs and the answers to secret questions also fall under this category. Creating a strong password is still recommended.

Strong Password – Consisting of at least 8 characters that contain a combination of letters, numbers, and symbols if allowed. Case-sensitive letters along with passwords that do not contain words that can be found in a dictionary.
However, even strong passwords we use today lack credibility in the security world, thus introducing two-factor authentication (2FA) or multi-factor authentication (MFA).

Something you have (The possession factor)

Anything a user must have in their possession in order to log in, such as a security token, a one-time password (OTP) token, a key fob, an employee ID card or a phone’s SIM card. For mobile authentication, a smartphone often provides the possession factor, in conjunction with an OTP app.

Something you are (The inherence factor)

Any biological traits the user has that are confirmed for login. This category includes the scope of biometric authentication methods such as retina scans, iris scans fingerprint scans, finger vein scans, facial recognition, voice recognition, hand geometry, even earlobe geometry.

Somewhere you are (The location factor)

The user’s current location is often suggested as a fourth factor for authentication. Again, the ubiquity of smartphones can help ease the authentication burden here: Users typically carry their phones and most smartphones have a GPS device, enabling reasonable surety confirmation of the login location. Often times, an email service will send you notifications about a log-in from a certain location that is not typical with the user’s usual location —the MFA tool may require the user to enter a code texted to the user’s phone. 

Something you do (The Time factor)

Often called Adaptive Authentication, this type of MFA takes context into account to flag logins that are out of the ordinary. When a person tries to authenticate in an unusual context, Adaptive MFA may tighten security by requesting additional credentials. For example, if a user is logging in from a cafe late at night—and this is not typical for that user—the MFA tool may require the user to enter a code texted to the user’s phone.

MFA is an effective way to provide enhanced security. Traditional usernames and passwords can be stolen, and they’ve become increasingly more vulnerable to brute force attacks. MFA creates multiple layers of security to help increase the confidence that the user requesting access is actually who they claim to be. With MFA, a cybercriminal may steal one credential but will be thwarted by having to verify identity in a different manner.

Sources:
NIST
Independent

Are you looking to break into the exciting field of cybersecurity? Join our 5-day CompTIA Security+ Bootcamp and build your cybersecurity knowledge and skills.
Check out our network+ bootcamp as well and become an expert in managing, maintaining, troubleshooting, installing and configuring basic computer networks.

Posted by & filed under CompTIA Security+.

Phishing

What is Phishing and How to Detect Phishing Attacks?

Part of CompTIA Security+ Objectives 1.2

Phishing is an email scam designed that appears to be from a legitimate company and ask you to provide sensitive information. Cybercriminals use phishing to attempt to obtain sensitive information such as credit card details and login credentials, by disguising as a trustworthy organization or reputable person in an email communication. This is usually done by including a link that will appear to take you to the company’s website to fill in your information – but the website is a clever fake and the information you provide goes straight to the crooks behind the scam.

Phishing is popular with cybercriminals because it enables them to steal sensitive financial and personal information without having to break through the security defenses of a computer or network. Public awareness about phishing campaigns has grown considerably in recent years, as many incidents have been covered by a variety of media sources. In addition to technical solutions, user security awareness is one of the cyber security measures being used to help counter attempted phishing incidents.

CompTIA Security+ Certification

How to Identify Phishing and How to Avoid being a Victim?

Identifying Fake Email Addresses

Where is your email coming from? Fake email addresses attempt to trick end users into a sense of comfort, security and legitimacy. Does the domain from which you’re receiving the email make sense? Is it consistent with the company’s domain?

Here are two ways to identify fake email addresses:

1. What comes after the @ sign?

As mentioned above, a legit email domain will match the URL for the organization’s website. Going back to the banking example, here are examples of safe and unsafe email domains.

  • Safe: @chase.com
  • Unsafe: @chasebank.com

At a quick glance, this seems like a reasonable and safe domain. But if the domain is anything different than what you would type in a web browser to access the organization’s website, it’s most likely a fake email address.

2. What name appears in the email?

Spoiler alert: it doesn’t matter. Real names don’t mean anything on the internet. There’s no intellectual property or restrictions on the names of emails when creating an account.

In fact, many legitimate businesses create fake names for marketing emails that just head back to a distro so they can avoid being flagged for email abuse when they are spamming without an opt-in policy. I could start an email account with your name, and there are no checks and balances on it. That’s why the domain is so important – there’s a registration process for domains related to unique IP addresses, so it’s not possible to copy without having inside access.

Identifying Fake Websites

One of the easier ways to mitigate cybersecurity risk is to train your employees to pay attention to the address bar in their web browser. As we rely more on backlinking, cookies and search engines to reach websites, employees tend to pay less attention to the URL in the address bar and go more and more into autopilot when browsing.

Pay attention to your browser and ask these questions to identify fake websites:

Is your connection secure? Look to the far left of your address bar. If you’re using Chrome or Firefox, you should see a padlock icon to indicate that your connection is safe.

If you are still using Internet Explorer: Stop reading this article, delete all your cookies and search history on IE, and install Chrome or Firefox. Those browsers are much safer. Don’t ever look back, and don’t feel bad about it.
BUT… Secure Socket Layer (SSL)/ Transport Layer Security (TLS) certificates are now easier for threat actors to get, so the “padlock” strategy isn’t effective enough on its own. The lock icon is not bulletproof, and it must be used in combination with the rest of the points that follow.

Identifying Fake URLs

1. Does the URL make sense?

Use the same strategy to identify fake websites that you would to identify fake email addresses. The main parts of the URL before .com or .org, etc., should not be an alphabet soup of letters and numbers. The domain origination of the main site and emails that you receive from the organization should match.

A relevant example for personal banking would be this:

Safe: chase.com/creditcardoffer
Unsafe: chasecom.io/creditcardoffer

Threat actors purposely try to mask their URLs in clever ways, often by incorporating special characters or a sandwich of letters that resemble the correct website. If you’re not looking closely, you can easily be duped into clicking the link and installing malware on your device, even if the link doesn’t load or takes you to a dead page.

2. Did you get the link in an email?

If so, don’t click. This sounds extreme. It also sounds slow and antiquated. But verification is a pillar of being vigilant. Even if the contact emailing you is in your address book, they could have been phished – you just never know.

Call or email the contact before clicking. Calling is always preferred. As for emailing, you must make sure you open a new email to ask them if the last email was legit. If you reply directly to the email in question, you’re communicating with a hacker, and they will mislead you.
Seriously, call them before you open the email. Especially if it’s from an internal source. That will only create a stronger cybersecurity culture. This may seem like an unnecessary or slow step, but it’s the entire point of the training exercise! The more cybersecurity is discussed, the more it is prioritized in typical day-to-day interactions.

Are you looking to break into the exciting field of cybersecurity? Join our 5-day CompTIA Security+ Bootcamp and build your cybersecurity knowledge and skills.
asmed.com/s1

Posted by & filed under ABOUT IT.

Cloud Security: How Secure is Cloud Data?

Saving documents, photos, videos and reports on a computer’s hard drive? That’s becoming almost quaint. Today, people are more frequently saving their files in the cloud, storage space not located in their computers or devices but on servers hosted by third-party providers.

The positives of storing data and files in the cloud are many: You won’t clutter your computer. If your laptop, tablet or smart phone crashes, you’ll still have access to your files. And it will take you a long time to ever use up all the space offered by most cloud providers.

But you might have concerns about cloud computing, including data protection, security threats, and potential data loss. You might worry that all those videos, photos, and reports might be vulnerable to data breach and hackers who could break into your cloud provider’s servers.

Or maybe you worry that your provider’s servers will crash, causing all those photos of your summer vacations or videos of your children’s elementary school graduation to disappear.

Here’s some reassurance, though: Information stored in the cloud is likely to be more secure than are files, images and videos stored on your own devices. Why? Cloud companies often rely on far more robust cybersecurity measures to protect your sensitive data.

What is the cloud?

What is the cloud? You’ve probably used it more than you think. Ever write an essay that you saved in Google Docs? Then you’ve used the cloud. Ever watch a movie on Netflix, stored images in Dropbox, or sent email messages through Yahoo Mail? Those are all cloud services.

At its most basic, the cloud refers to any type of software or service that isn’t located on your personal computer or devices but instead runs on the internet. The files, images and videos that you save on cloud services are stored on the servers of third parties, companies such as Amazon, Google, and Microsoft*.

You can then get at these files whenever you are using a device connected to the internet. If you’ve saved photos from your most recent trip to the beach, you don’t have to wait until you’re at your laptop computer to access them. You can find them by logging onto the internet from any computer or device anywhere.

Popular cloud service providers include Google Cloud Platform, Amazon Web Services, and Microsoft Azure, to name a few. Everything from Hulu and Dropbox to Gmail and Office 365 is hosted in the cloud, not on your personal computer or phone*.

How secure is the cloud?

It’s natural to wonder if your data is safe when it’s stored in the cloud infrastructure. After all, your files, photos and videos are being stored on servers that are not under your control. You might wonder how vulnerable these servers are to cyberthieves.

Here’s the truth, though: The data that you save with cloud service providers may likely be safer than the information you’ve stored in your computer’s hard drive. Remember, hackers can use malware and phishing emails to get the information stored on your own devices. They might freeze your computer, demanding a ransom before they’ll release the files and data they’ve frozen.

The security measures undertaken by larger companies providing cloud services are likely to be more robust and powerful than what you have protecting your home computer and devices.

Why is the cloud security so robust?

What makes cloud storage so safe? First, servers are usually located in warehouses that most workers don’t have access to. Secondly, the files stored on cloud servers are encrypted. This means that they are scrambled, which makes it far harder for cybercriminals to access.

Here is a look at some of the security measures that cloud providers frequently use to protect your data.

Consistent security updates

How often do you ignore those notifications to update your operating system, browser or email service? That’s a no-no in the world of computer security. Those updates often contain tools designed to protect your devices from the latest viruses or malware.

When you store your data in the cloud, though, the companies overseeing the servers should be consistently updating their security measures. You won’t have to worry about forgetting to run an update. Your cloud service provider will regularly update its security measures.

AI tools and auto-patching

Cloud providers are also turning to artificial intelligence, or AI, to help protect your data. This is important: It’s not easy to find experienced security professionals to oversee data. Cloud providers, though, can instead turn to AI to tackle at least the first level of security analysis. These programs rely on built-in algorithms to seek out and identify possible vulnerabilities in security measures.

Built-in firewalls

Cloud providers rely on firewalls, too, to help protect your files. As the name suggests, this technology acts a bit like a wall keeping your data safe.

Firewalls, which can be hardware- or software-based, apply rules to all of the traffic coming into a network. These rules are designed to filter out suspicious traffic and to keep your data behind the wall. This makes it more difficult for hackers to slip malware or viruses past the security measures used by your cloud service provider.

Redundancy

But what about hardware failures or power outages? Will you be able to access your data if your cloud provider suffers a natural disaster or large-scale outage?

Yes, because most of the biggest cloud providers practice redundancy. This means that they copy your data several times and store them on many different data centers. This way, if one server goes down, you can access your files from a back-up server.

Third-party security testing

Your cloud provider should also hire outside security companies to test their servers and software regularly to make sure they are safe from hackers, cybercriminals and the latest malware and viruses. This outside testing boosts the odds that your cloud provider will have the defenses needed to keep your files away from hackers.

Yes, because most of the biggest cloud providers practice redundancy. This means that they copy your data several times and store them on many different data centers. This way, if one server goes down, you can access your files from a back-up server.

What precautions can you take to boost your cloud security?

Are you already storing your files in the cloud? If so, you can take certain steps to help enhance the security of that data.

Encrypt your data

First, make sure you send your files to a cloud services provider that encrypts your data. You want to make it as difficult as possible for hackers to get at your information. Storing your images and files with a provider that relies on encryption will give hackers pause. It’s easier for them to steal data that hasn’t been scrambled.

Perform data backups

Make sure you only work with cloud providers that back up your data. You don’t want all your information stored on just one server. If that server goes offline, you won’t be able to access your data. You might also consider backing up your most sensitive information in your own external hard drives even if you are saving it in the cloud. This will provide you with an extra layer of protection should something happen with your cloud provider.

Enable two-factor authentication

You can make life more difficult for hackers by enabling two-factor authentication. As the name suggests, two-factor authentication requires you to provide two pieces of information when logging onto a site.

Say you are logging onto your bank’s online site. First, you provide your username and password, as usual. Then you wait for your bank to send a code to your email address or phone. You then enter this code online to access your accounts. This extra step makes it more difficult for hackers to get at your emails, personal information or financial information.

Are you looking to break into the exciting field of cybersecurity? Join our 5-day CompTIA Security+ Bootcamp and build your cybersecurity knowledge and skills.

Posted by & filed under ABOUT IT, CompTIA Security+, Sec+.

One of the fastest growing areas of the enterprise is cybersecurity. Every year, more attacks are carried out meaning more of the IT budget is allocated for bolstering security, ultimately leading to the need to hire more cybersecurity experts to protect the organization.


According to cybersecurity company CrowdStrike, which recently published a casebook with takeaways and insights into the frontlines of incident response (IR) cases spanning 2018, organizations are not making substantive progress to detect intruders and stop breaches overall.


The study also found that commodity malware was often observed as a precursor to larger, more disruptive attacks, and that there has been a dramatic rise in the number of attacks that leveraged social engineering and phishing.


With 82% of IT and cybersecurity professionals claiming they don’t have the right amount of necessary talent within their organization, many are no resorting to in-house training to bring their employees up to scratch.


Certifications are often the best way to ensure the people you work with have the right knowledge and skills to excel in their job. It provides recommendations based on the National Institute of Standards and Technology (NIST) framework and has developed a stringent process for local vendors that includes a comprehensive evaluation of all qualifications.

The Importance of Security+ certification


For those who are already in the IT security field, or are looking to enhance their career, there is a range of certifications and training options available for those who want to learn about IT security and demonstrate that knowledge to current and potential employers. However, a lot of the more advanced IT security certifications require a level of knowledge, experience, and commitment that might be outside of the range of many newer IT professionals.


A good certification to demonstrate basic security knowledge is the CompTIA Security+ certification. Unlike other certifications, such as the CISSP or the CISM, the Security+ doesn’t have any mandatory experience or prerequisites, though CompTIA does recommend that candidates have at least two years of experience with networking in general and security in particular. CompTIA also suggests that Security+ candidates obtain the CompTIA Network+ certification, but they don’t require it.


CompTIA Security+ is an internationally recognized, vendor-neutral certification from CompTIA that demonstrates competency in the baseline skills needed for a career in IT security industry. Earning this certification verifies your skills in the following areas based on the exam objectives:


Threats, attacks and vulnerabilities: You can detect various kinds of compromise and have knowledge of penetration testing and vulnerability scanning.


Technologies and tools: You can deploy various network components, as well as assess and troubleshoot problems to support operational and information security technology.


Architecture and design: You know how to implement a secure network architecture, cloud computing, virtualization technology and systems design.


Identity and access management: You can implement access controls and identity management and access services, as well as management control.


Risk management: You understand risk management and data security best practices and their business impact.


Cryptography and PKI: You can install and configure settings for wireless security and implement public key infrastructure (PKI).

Benefits of CompTIA Security+ Certification


This certification is ideal for IT security professionals who are relatively new to the field or have never taken a security certification exam before. It’s also useful if you’re looking to switch to cybersecurity from a related field. It is recommended as the first security certification you should earn, as it deals with the core skills needed for any job in cyber security and can help you to move into an intermediate-level cybersecurity position. If you consider getting this CompTIA certification, the benefits listed below will help you make the right decision.


  1. Vendor-Neutral Certification

The certification is vendor-neutral, which indicates that you do not have to center on technology and security of a precise vendor. Thus, you can incorporate the common components of cybersecurity. The extensive skills and knowledge accumulated while achieving the certification make security professionals and network administrators become very much in demand in the IT marketplace. This imparts you the skill to prospect several opportunities in the field.


  1. Prerequisites and Required Experience

Since it is an entry-level certification, it is not expected to have much experience. This is one of the main benefits of the certification why many people entering the security industry choose to obtain CompTIA Security+ certification to improve their career potentials considerably. Unlike other cybersecurity certifications, this one doesn’t have any requirements. It is only suggested that the professionals appearing for the certification exam should have at least two years of working experience in security and networking fields to raise their possibilities of passing the exam and being hired in time.


  1. Globally Accepted Certification

The CompTIA Security+ certification is globally acknowledged to be one of the fundamental security certifications in the field of cybersecurity. Presented by CompTIA (Computing Technology Industry Association), the Security+ certification is also approved by ANSI and is created to demonstrate the understanding of an individual to employ the knowledge, skills, and features required to be compliant with ISO 17024 standard.


  1. High Career Opportunity

The professionals in the field of cybersecurity are desired by organizations in the private and public areas. The CompTIA Security+ certification provides you an advantage to handle security and network administration responsibilities. With this certification, you can take up a broad range of jobs with various services, such as Compliance and Operational Security, Cryptography, Threats and Vulnerabilities, Data and Host Security, Access Control and Identity Management, and Application.


  1. Higher Pay Scale

The professionals with the Security+ certification have greater opportunities of receiving higher salaries than their non-certified co-workers. With this certification to your resume, you can expect to receive an average salary of between $42,130 and $95,830 as a network engineer. It is necessary to mention that there are other factors that determine how much you earn, and these factors involve your level of experience and accreditation. Within a few years, the professional with the CompTIA Security+ certification can earn about $66,890 per year.


  1. Opportunity to Take up Government Work

If you aspire to get a cybersecurity or networking job in any government agency, obtaining the CompTIA Security+ certification is an ideal starting point for you. The certification satisfies the DoD 8570 standard. It is perceived as a compliance standard that is employed for citing many prerequisites required for government employees and contractors at various levels of work in the IT area. The certification meets the DoD 8570 compliance standards that are required for both Technical Level Two and Management Level One positions.


  1. Opportunity to Learn and Develop

Before you can achieve the certification, you will be expected to study the exam objectives and contents. After significant preparation, you have to clear the exam. In the course of preparing for the exam, you will learn many things about cybersecurity. Moreover, you will acquire skills and knowledge that will benefit you become a greater security professional. This is why hiring managers always look after for the professionals with this CompTIA certification. The certification is evidence of your expertise and skills in the job field.


  1. Opportunity to Work Anywhere in the World

One notable benefit of achieving the CompTIA Security+ certification is that it is universally recognized, trusted, and accepted all over the globe. Wherever you want to work, this certification can open the door for you. If you aspire to work in the USA, Security+ will make it possible for you. For example, it is recognized by the United States Department of Defence and can work as an icebreaker for any government agency job. If you wish to work as a network cybersecurity professional, this Security+ certification is essential for you.


Earning the CompTIA Security+ certification can help you land job roles that are in high demand and command a good salary, such as security architect, security engineer, security or systems administrator, security analyst, network administrator, security consultant, and junior IT auditor. Although certification isn’t typically a requirement for these positions, it can provide a career advantage.


The U.S. Department of Defense has approved the CompTIA Security+ credential to meet Directive 8140/8570.01-M requirements. The certification also complies with ISO 17024.

Check out ASM's Cyber Security Program

If you are looking to re-skill or get your feet wet on cyber security, ASM offers training classes available both on-site and online. ASM's training program includes Exam Voucher, Extensive Hands-on Labs, Lunch, Refreshments, Indoor Garage Parking Voucher, Practice Exam, and One Year Free Re-take Policy at ASM HQ Facility.

Posted by & filed under ABOUT IT, CompTIA Network+.

The newest updates for the CompTIA Network+ (N10-009) certification, which launched in June 2024, reflect the latest networking technologies and trends. This version incorporates advanced concepts like Software-Defined Networking (SDN), Software-Defined WAN (SD-WAN), and Infrastructure as Code (IaC), which automate and optimize network management through code. There’s also a strong focus on cloud integration, zero-trust architecture, and scalability using tools like VxLAN (Virtual Extensible LAN) for large-scale network deployments.

Compared to the previous version (N10-008), the N10-009 exam has expanded its coverage of cloud computing, network security, and modern networking environments. Key additions include enhanced discussion on network hardening, identity access management, and encryption technologies, reflecting the industry’s growing need for robust security in cloud-based and hybrid networks.

This version also introduces new learning tools like CertMaster, which provides hands-on labs and adaptive learning to improve skill retention. For professionals, these updates make the N10-009 a strong foundational certification for roles like network administrator, cloud engineer, and help desk technician.

This certification ensures professionals are well-equipped to handle evolving technologies, making it ideal for those entering the fields of networking and cybersecurity

Are you looking to break into the exciting field of Networking? Join our 5-day CompTIA Network+ Boot camp Training and build your networking knowledge and skills. 

Posted by & filed under ABOUT IT, CompTIA Network+.

Why Network+ Certification?

Network+ is offered by the Computing Technology Industry Association (CompTIA) which is the top vendor-neutral provider of IT certs. Some of you might be thinking, “Why take CompTIA Network+ first and not jump into Cisco Certified Network Associate certification (CCNA) path right away?”. While you could jump straight into the CCNA path, However, Cisco assumes that you have prior networking experience and specifically with their routing and switching equipment. It is good to have a mix of certifications on your resume, and as a beginner in IT or with networking, Network+ is the best certification to start. Additionally, going vendor-neutral can sometimes be a good thing because the focus isn’t on the hardware, but more on the logical framework of the technology. Networking is important for obvious reasons. If you don’t have network connectivity, you can’t expect to do much from your desk.

Network+ Certification Background

CompTIA has been offering industry standard certification for over 20 years, and has granted 2 million IT certifications in that time. The Network+ certification was created by CompTIA and accredited by the American National Standards Institute (ANSI) in 2008. When granted the Network+ certification, it is good for 3 years. After 3 years, there is a recertification requirement to take the latest exam in order to stay up-to-date. CompTIA describes Network+ as an entry-level certification, which is partially true. I would not pick up the book, read it and feel like you could take the test and be certified. I believe it is good to have at least some familiarity with networking and the different kinds of equipment before you take this on; it will definitely help with keeping pace with your training.

Training Available

There is an abundance of training available for the Network+ certification. At ASM, we offer a bundle of  Network+ / A+ or A+/Network+/Security+. As a Network+ certified professional, you will demonstrate proficiency in the following areas:

  • Design and implement functional networks
  • Configure, manage, and maintain essential network devices
  • Use devices such as switches and routers to segment network traffic and create resilient networks
  • Identify benefits and drawbacks of existing network configurations
  • Implement network security, standards, and protocols
  • Troubleshoot network problems
  • Support the creation of virtualized networks

It is imperative that you find a good training course led by a qualified training instructor. At ASM we provide many training options and course formats including Virtual ILT classrooms (WebEx) and live in person classroom.

Network+ Exam Details

The Network+ exam consists of 90 questions in a mix of multiple choice, drag and drops and performance based formats. You will have 90 minutes to complete the exam and results are immediate. The passing score for the exam is 720 on a scale of 100-900 and the exam voucher will cost $319 USD.

What Next?

The Network+ certification is a launching pad for your career. You can go in so many different directions after passing the Network+ exam. To stay within the CompTIA path, the next option would be Security+ which every IT administrator should have.  A+ is an option if you plan to be more hardware focused in your career. There’s also Linux+, Cloud+, PenTest+ and many more depending on what your desired career path is. If you love networking and want to continue to more advanced certifications, the CCNA is a good next choice.

Is it For Me?

If you are planning on having a long career in IT, then the answer is a resounding YES! Get Network+ certified. It is an amazing class and will really help you get a firm understanding of networking fundamentals. Having a solid foundational knowledge of networking will serve you well in the many years of your IT career to come.

Posted by & filed under Community Outreach.

Please Join us for this Homeless Outreach on Sunday 4/12/2020 at 6:15 pm in Rockville MD.

Location:

Women’s Shelter

2 Taft Court, Rockville, MD (map)

[bs_icon name=”glyphicon glyphicon-collapse-down”] We look forward to serving people at women’s Shelter located in Rockville, MD. Please join us on 2nd Sunday of each month at 2 Taft court , Rockville MD .

Posted by & filed under Community Outreach.

Please Join us for this Homeless Outreach on Sunday 3/8/2020 at 6:15 pm in Rockville MD.

Location:

Women’s Shelter

2 Taft Court, Rockville, MD (map)

[bs_icon name=”glyphicon glyphicon-collapse-down”] We look forward to serving people at women’s Shelter located in Rockville, MD. Please join us on 2nd Sunday of each month at 2 Taft court , Rockville MD .

Posted by & filed under Community Outreach.

Please Join us for this Homeless Outreach on Sunday 2/9/2020 at 6:15 pm in Rockville MD.

Location:

Women’s Shelter

2 Taft Court, Rockville, MD (map)

[bs_icon name=”glyphicon glyphicon-collapse-down”] We look forward to serving people at women’s Shelter located in Rockville, MD. Please join us on 2nd Sunday of each month at 2 Taft court , Rockville MD .

Posted by & filed under Community Outreach.

Please Join us for this Homeless Outreach on Sunday 12/12/2020 at 6:15 pm in Rockville MD.

Location:

Women’s Shelter

2 Taft Court, Rockville, MD (map)

[bs_icon name=”glyphicon glyphicon-collapse-down”] We look forward to serving people at women’s Shelter located in Rockville, MD. Please join us on 2nd Sunday of each month at 2 Taft court , Rockville MD .

Posted by & filed under Community Outreach.

Please Join us for this Homeless Outreach on Sunday 10/13/2019 at 6:15 pm in Rockville MD.

Location:

Women’s Shelter

2 Taft Court, Rockville, MD (map)

[bs_icon name=”glyphicon glyphicon-collapse-down”] We look forward to serving people at women’s Shelter located in Rockville, MD. Please join us on 2nd Sunday of each month at 2 Taft court , Rockville MD .

Posted by & filed under Community Outreach.

Please Join us for this Homeless Outreach on Sunday 09/08/2019 at 6:15 pm in Rockville MD.

Location:

Women’s Shelter

2 Taft Court, Rockville, MD (map)

[bs_icon name=”glyphicon glyphicon-collapse-down”] We look forward to serving people at women’s Shelter located in Rockville, MD. Please join us on 2nd Sunday of each month at 2 Taft court , Rockville MD .

Posted by & filed under Community Outreach.

Please Join us for this Homeless Outreach on Sunday 08/11/2019 at 6:15 pm in Rockville MD.

Location:

Women’s Shelter

2 Taft Court, Rockville, MD (map)

[bs_icon name=”glyphicon glyphicon-collapse-down”] We look forward to serving people at women’s Shelter located in Rockville, MD. Please join us on 2nd Sunday of each month at 2 Taft court , Rockville MD .

Posted by & filed under Community Outreach.

Please Join us for this Homeless Outreach on Sunday 07/14/2019 at 6:15 pm in Rockville MD.

Location:

Women’s Shelter

2 Taft Court, Rockville, MD (map)

[bs_icon name=”glyphicon glyphicon-collapse-down”] We look forward to serving people at women’s Shelter located in Rockville, MD. Please join us on 2nd Sunday of each month at 2 Taft court , Rockville MD .

Posted by & filed under Community Outreach.

Please Join us for this Homeless Outreach on Sunday 03/14/2019 at 6:15 pm in Rockville MD.

Location:

Women’s Shelter

2 Taft Court, Rockville, MD (map)

  • ASMED outreach 1
  • ASMED outreach 5
  • ASMED outreach 4
  • ASMED outreach 3
  • ASMED outreach 4
  • ASMED outreach 4
  • ASMED outreach 4

[bs_icon name=”glyphicon glyphicon-collapse-down”] We look forward to serving people at women’s Shelter located in Rockville, MD. Please join us on 2nd Sunday of each month at 2 Taft court , Rockville MD .

Posted by & filed under Community Outreach.

Please Join us for this Homeless Outreach on Sunday 03/10/2019 at 6:15 pm in Rockville MD.

Location:

Women’s Shelter

2 Taft Court, Rockville, MD (map)

  • ASMED outreach 1
  • ASMED outreach 5
  • ASMED outreach 4
  • ASMED outreach 3
  • ASMED outreach 4
  • ASMED outreach 4

[bs_icon name=”glyphicon glyphicon-collapse-down”] We look forward to serving people at women’s Shelter located in Rockville, MD. Please join us on 2nd Sunday of each month at 2 Taft court , Rockville MD .

Posted by & filed under Community Outreach.

Please Join us for this Homeless Outreach on Sunday 01/13/2019 at 6:15 pm in Rockville MD.

Location:

Women’s Shelter

2 Taft Court, Rockville, MD (map)

[bs_icon name=”glyphicon glyphicon-collapse-down”] We look forward to serving people at women’s Shelter located in Rockville, MD. Please join us on 2nd Sunday of each month at 2 Taft court , Rockville MD .

Posted by & filed under Community Outreach.

Please Join us for this Homeless Outreach on Sunday 10/14/2018 at 6:15 pm in Rockville MD.


Location:

Women’s Shelter

2 Taft Court, Rockville, MD (map)

[bs_icon name=”glyphicon glyphicon-collapse-down”] We look forward to serving people at women’s Shelter located in Rockville, MD. Please join us on 2nd Sunday of each month at 2 Taft court , Rockville MD .

Posted by & filed under Community Outreach.

Please Join us for this Homeless Outreach on Sunday 09/09/2018 at 6:15 pm in Rockville MD.


Location:

Women’s Shelter

2 Taft Court, Rockville, MD (map)

[bs_icon name=”glyphicon glyphicon-collapse-down”] We look forward to serving people at women’s Shelter located in Rockville, MD. Please join us on 2nd Sunday of each month at 2 Taft court , Rockville MD .

Posted by & filed under Community Outreach.

Please Join us for this Homeless Outreach on Sunday 08/12/2018 at 6:15 pm in Rockville MD.


Location:

Women’s Shelter

2 Taft Court, Rockville, MD (map)


[bs_icon name=”glyphicon glyphicon-collapse-down”] We look forward to serving people at women’s Shelter located in Rockville, MD. Please join us on 2nd Sunday of each month at 2 Taft court , Rockville MD .

Posted by & filed under Community Outreach.

Please Join us for this Homeless Outreach on Sunday 07/8/2018 at 6:15 pm in Rockville MD.


Location:

Women’s Shelter

2 Taft Court, Rockville, MD (map)


[bs_icon name=”glyphicon glyphicon-collapse-down”] We look forward to serving people at women’s Shelter located in Rockville , MD. Please join us on 2nd Sunday of each month at 2 Taft court , Rockville MD .

Posted by & filed under Community Outreach.

Please Join us for this Homeless Outreach on Sunday 06/10/2018 at 6:15 pm in Rockville MD.


Location:

Women’s Shelter

2 Taft Court, Rockville, MD (map)


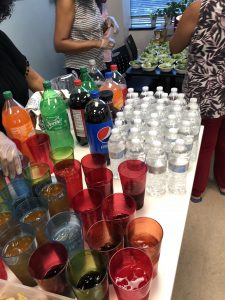
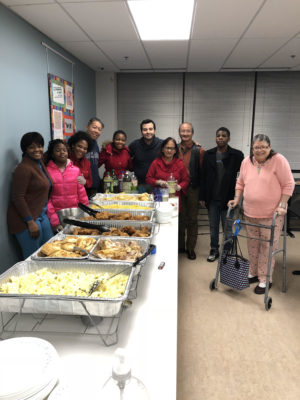
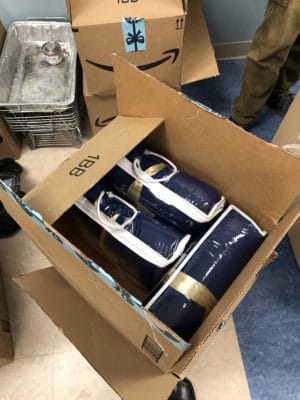
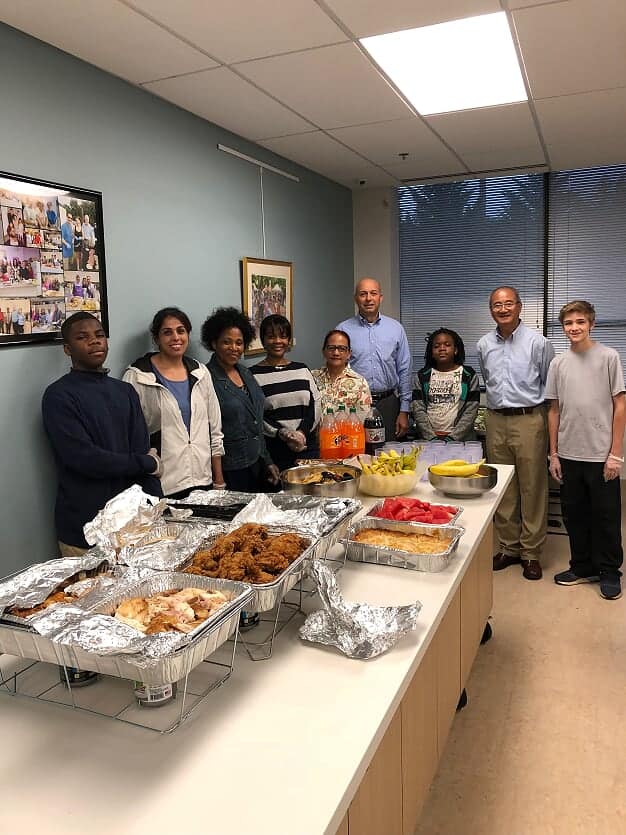
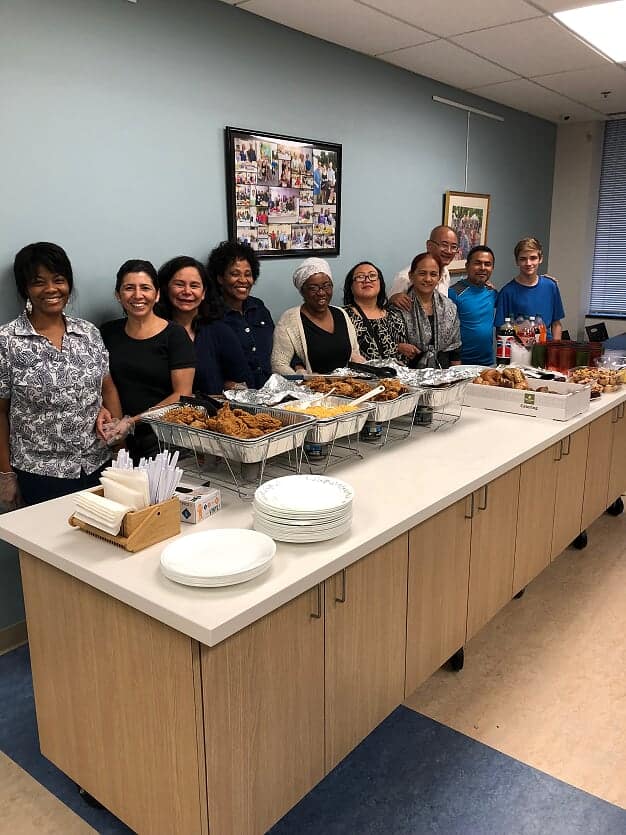
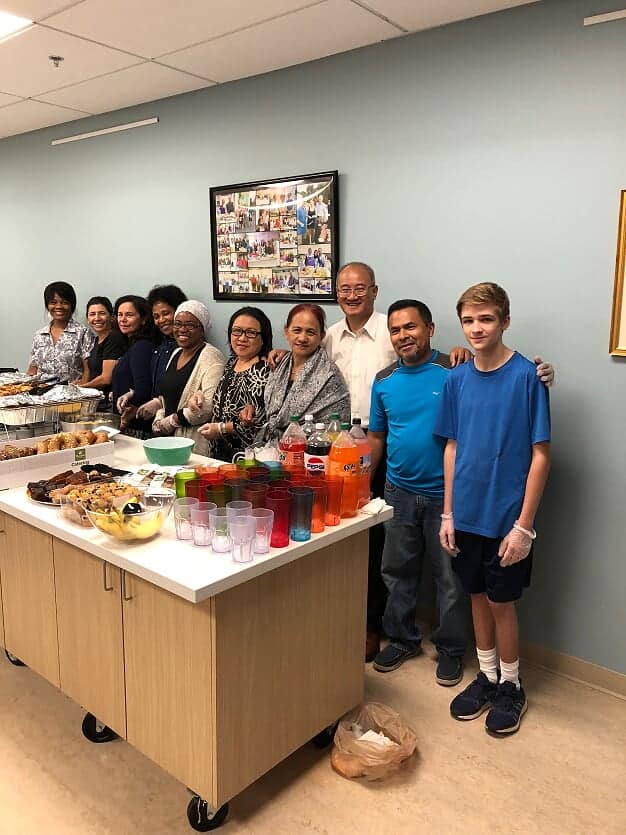
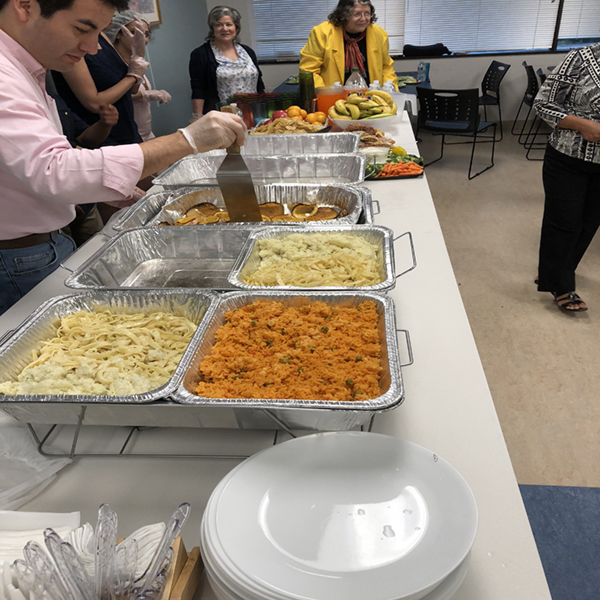
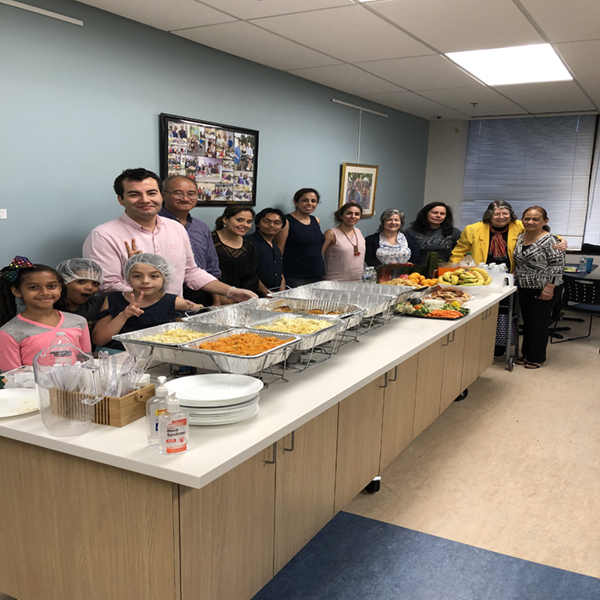
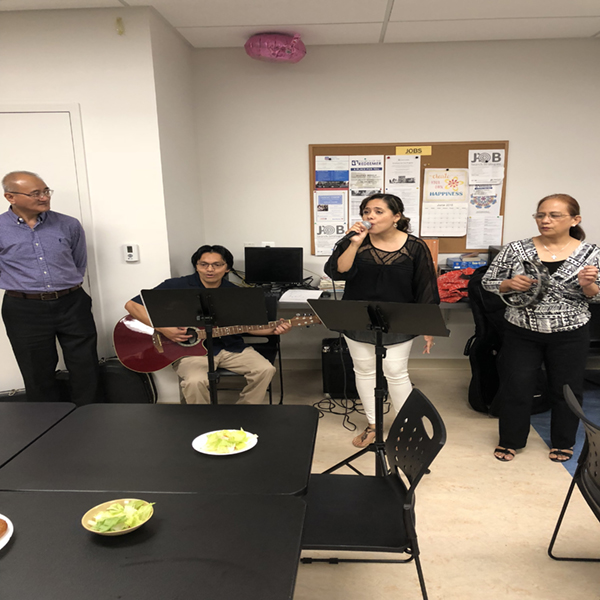
[bs_icon name=”glyphicon glyphicon-collapse-down”] It was a blessings night to serve about 35 people at women’s Shelter located in Rockville , MD. Please join us on 2nd Sunday of each month at 2 Taft court , Rockville MD .

Posted by & filed under Amazon AWS.

Amazon AWS Confiuguring WAF to Block IP address

AWS WAF is a web application firewall service that helps protect your web apps from common exploits that could affect app availability, compromise security, or consume excessive resources


In here we have two instances called LinuxWebserver1 and Linux Webserver3 that are part of Application Load Balancer; and the goal is that my Ip address ( my laptop Ip address) will not be able to access this Website


Step 1) First I show you what I have with two instances

Step 2) When I go to Load Balancer on the left side and copy and paste long DNS name ; I will be able to see both content of the Websites (after refresh) that shows the ALB is working good.

Step 3) Or since I have “A” record on Route 53 , I can use the domain name on Route 53 , so life is good


Step 4) now goal is to block hamed2019.com so that my home PC Ip address will not be able to see it.


Step 5) go to WAF , click configure WEB ACL , on the Concepts overview , we will see what we can do it; so click next , then called it WebDenyACL

Syep 6) Pick the Region N.Va and then pick resources which  is Application Load Balancer , then click next

Step 7) now we will create a condition, as we see in video we can pick any of the condition

  • Cross-site scripting match conditions
  • Geo match conditions
  • IP match conditions
  • Size constraint conditions
  • SQL injection match conditions
  • String and regex match conditions

Step 8) Click create IP match condition

Step 9) Give the name “MyHomePC” then go to google and search what is my IP address ; and you will get the Ip address for example :

100.15.97.150


Step 10) put the above number 100.15.97.150/32 ( /24 means block and range of IP address ) /32means only that particular Ip address , then make sure click add Ip address


Step 11 ) Now we click next and then we want to create a Rule , on next page click Rule and called “HomePCRule”

Step 12) Then go to section “Add Condition” and do as follow”

When a Request “does” originate from an Ip address

                                           “MyHomePC” Then you will see IP address=100.15.97.32

 Then click create.


Step 12) On next page leave it as block then for default action, pick first one

               “Allow all request that does not match any rule”


Step 13) Click Review and create , that will take to next page ; then read it and click confirm and create


Step 14) Now go to left side and click on WebACL rule ; then click on “WebDenyACL” then go to tab called Rules ; then you should see all information.

Step 15 ) Now try to access the website ; by either copy and paste long DNS name from load balancer to use your domain name . you should see Forbidden Error 403


Step 16) Hint : when you click on “Web ACL” on left  ; then you might see few name on it ; when you click one of them ; then go to TAB Rules ; and then at bottom you will see add association . then you will see this :


You can associate only one web ACL with a specific resource. If a different web ACL is already associated with the selected resource, the association will be updated with this web ACL.

Posted by & filed under Amazon AWS.

Question

6) A web application allows customers to upload orders to an S3 bucket. The resulting Amazon S3 events trigger a Lambda function that inserts a message to an SQS queue. A singleEC2 instance reads messages from the queue, processes them, and stores them in an DynamoDB table partitioned by unique order ID. Next month traffic is expected to increase by a factor of 10 and a Solutions Architect is reviewing the architecture for possible scaling problems.Which component is MOST likely to need re-architecting to be able to scale to accommodate the new traffic?

A.Lambda function
B.SQS queue
C.EC2 instance
D.DynamoDB table

7) An application saves the logsto an S3 bucket. A user wants to keep the logs forone month for troubleshooting purposes, and then purge the logs. What feature will enable this?

A.Adding a bucket policy on the S3 bucket.
B.Configuring lifecycle configuration rules on the S3 bucket.
C.Creating an IAM policy for the S3 bucket.
D.Enabling CORS on the S3 bucket.

8) An application running on EC2 instances processes sensitive information stored on Amazon S3. The information is accessed over the Internet. The security team is concerned that the Internet connectivity to Amazon S3 is a security risk.Which solution will resolve the security concern?

A.Access the data through an Internet Gateway.
B.Access the data through a VPN connection.
C.Access the data through a NAT Gateway.
D.Access the data through a VPC endpoint for Amazon S3.

9) An organization is building an Amazon Redshift cluster in their shared services VPC. The cluster will host sensitive data.How can the organization control which networks can access the cluster?

A.Run the cluster in a different VPC and connect through VPC peering.
B.Create a database user inside the Amazon Redshift cluster only for users on the network.
C.Define a cluster security group for the cluster that allows access from the allowed networks.
D.Only allow access to networks that connect with the shared services network via VPN.

10) A Solutions Architect is designing an online shopping application running in a VPC on EC2 instances behind an ELB Application Load Balancer.The instances run in an Auto Scaling group across multiple Availability Zones. The application tiermust read and write data to a customer managed database cluster. There should be no access to the database from the Internet, but the cluster must be able to obtain software patches from the Internet.Which VPC design meets these requirements?

A.Public subnets for both the application tier and the database cluster.
B.Public subnets for the application tier, and private subnets for the database cluster.
C.Public subnets for the application tier and NAT Gateway, and private subnets for the database cluster.
D.Public subnets for the application tier, and private subnets for the database cluster and NAT Gateway.

Answers

6) C –Asingle EC2 instance will not scale and is a single point of failure in the architecture. A much better solution would be to have EC2 instances in an Auto Scaling group across 2 availability zones read messages from the queue. The other responses are all managed services that can be configured to scale or will scale automatically. For more information Click here

7) B –Lifecycle configuration allows lifecycle management of objects in a bucket. The configuration is a set of one or more rules, where each rule defines an action for Amazon S3 to apply to a group of objects. Bucket policies and IAM define access to objects in an S3 bucket. CORS enables clients in one domain to interact with resources in a different domain.

8) D –VPC endpoints for Amazon S3 provide secure connections to S3 buckets that do not require a gateway or NAT instances. NAT Gateways and Internet Gateways still route traffic over the Internet to the public endpoint for Amazon S3. There is no way to connect to Amazon S3 via VPN. For more information Click here

9) C –A security group can grant access to traffic from the allowed networks via the CIDR range for each network. VPC peering and VPN are connectivity services and cannot control traffic for security. Amazon Redshift user accounts address authentication and authorization at the user level and have no control over network traffic. For more information Click here

10) C –The online application must be inpublic subnets to allow access from clients’ browsers. The database cluster must be in private subnets to meet the requirement that there be no access from the Internet. For more information Click here

Source: Amazon

Posted by & filed under Amazon AWS.

Question

1) A company is storing an access key (access key ID and secret access key) in a text file on a custom AMI. The company uses the access key to access DynamoDBtables from instances created from the AMI. The security team has mandated a more secure solution.Which solution will meet the security team’s mandate?

A.Put the access key in an S3 bucket, and retrieve the access key on boot from the instance.
B.Pass theaccess key to the instances through instance user data.
C.Obtain the access key from a key server launched in a private subnet.
D.Create an IAM role with permissions to access the table, and launch all instances with the new role.

2) A company is developing a highly available web application using stateless web servers. Which services are suitable for storing session state data?(Select TWO.)

A.CloudWatch
B.DynamoDB
C.Elastic Load Balancing
D.ElastiCache
E.Storage Gateway

3) Company salespeople upload their sales figures daily.

A Solutions Architect needs a durable storage solution for these documents that also protects against users accidentally deleting important documents. Which action will protect against unintended user actions?

A.Store data in an EBS volume and create snapshots once a week.
B.Store data in an S3 bucket and enable versioning.
C.Store data in two S3 buckets in different AWS regions.
D.Store data on EC2 instance storage.

4) An application requires a highly available relational database with an initial storage capacity of 8 TB. The database will grow by 8 GB every day. To support expected traffic, at least eight read replicas will be required to handle database reads.Which option will meet these requirements?

A.DynamoDB
B.Amazon S3
C.Amazon Aurora
D.Amazon Redshift

5) A Solutions Architect is designing a critical business application with a relational database that runs on an EC2 instance. It requires a single EBS volume that can support up to 16,000 IOPS.

Which Amazon EBS volume typecan meet the performance requirements of this application?

A.EBS Provisioned IOPS SSD
B.EBS Throughput Optimized HDD
C.EBS General Purpose SSD
D.EBS Cold HDD

Answers

1) D–IAM roles for EC2 instances allow applications running on the instance to access AWS resources without having to create and store any access keys. Any solution involving the creation of an access key then introduces the complexity of managing that secret. For more information click here.

2) B, D –Both DynamoDB and ElastiCache provide high performance storage of key-value pairs. CloudWatch and ELB are not storage services. Storage Gateway is a storage service, but it is a hybrid storage service that enables on-premises applications to use cloud storage.

3) B –If a versioned object is deleted, then it can still be recovered by retrieving the final version. Response A would lose any changes committed since the previous snapshot. Storing the data in 2 S3 buckets would provide slightly more protection, but a user could still delete the object from both buckets. EC2 instance storage is ephemeral and should never be used for data requiring durability. For more information click here.

4) C –Amazon Aurora is a relational database that will automatically scale to accommodate data growth. Amazon Redshift does not support read replicas and will not automatically scale. DynamoDB is a NoSQL service, not a relational database. Amazon S3 is object storage, not a relational database.

5) A –EBS Provisioned IOPS SSD provides sustained performance for mission-critical low-latency workloads. EBS General Purpose SSD can provide bursts of performance up to 3,000 IOPS and have a maximum baseline performance of 10,000 IOPS for volume sizes greater than 3.3 TB. The 2 HDD options are lower cost, high throughput volumes.

Source: Amazon

Posted by & filed under Amazon AWS.


1) Why is AWS more economical than traditional data centers for applications with varying compute workloads?

A) Amazon Elastic Compute Cloud (Amazon EC2) costs are billed on a monthly basis.
B) Customers retain full administrative access to their Amazon EC2 instances.
C) Amazon EC2 instances can be launched on-demand when needed.
D) Customers can permanently run enough instances to handle peak workloads.


2) Which AWS service would simplify migration of a database to AWS?

A) AWS Storage Gateway
B) AWS Database Migration Service (AWS DMS)
C) Amazon Elastic Compute Cloud (Amazon EC2)
D) Amazon AppStream 2.0


3) Which AWS offering enables customers to find, buy, and immediately start using software solutions in their AWS environment?

A) AWS Config
B) AWS OpsWorks
C) AWS SDK
D) AWS Marketplace


4) Which AWS networking service enables a company to create a virtual network within AWS?

A) AWS Config
B) Amazon Route 53
C) AWS Direct Connect
D) Amazon Virtual Private Cloud (Amazon VPC)


5) Which of the following is AWS’s responsibility under the AWS shared responsibility model?

A) Configuring third-party applications
B) Maintaining physical hardware
C) Securing application access and data
D) Managing custom Amazon Machine Images (AMIs)


6) Which component of AWS global infrastructure does Amazon CloudFront use to ensure low-latency delivery?

A) AWS Regions
B) AWS edge locations
C) AWS Availability Zones
D) Amazon Virtual Private Cloud (Amazon VPC)


7) How would a system administrator add an additional layer of login security to a user’s AWS Management Console?


A) Use AWS Cloud Directory
B) Audit AWS Identity and Access Management (IAM) roles
C) Enable Multi-Factor Authentication
D) Enable AWS CloudTrail


8) Which service can identify the user that made the API call when an Amazon Elastic Compute Cloud (Amazon EC2) instance is terminated?

A) Amazon CloudWatch
B) AWS CloudTrail
C) AWS X-Ray
D) AWS Identity and Access Management (AWS IAM)


9) Which service would you use to send alerts based on Amazon CloudWatch alarms?

A) Amazon Simple Notification Service (Amazon SNS)
B) AWS CloudTrail
C) AWS Trusted Advisor
D) Amazon Route 53


10) Where can a customer find information about prohibited actions on AWS infrastructure?

A) AWS Trusted Advisor
B) AWS Identity and Access Management (IAM)
C) AWS Billing Console
D) AWS Acceptable Use Policy


Answers
1) C

2) B

3) D

4) D

5) B

6) B

7) C

8) B

9) A

10) D


Source: Amazon

Posted by & filed under Amazon AWS.


Feature

Application Load Balancer Network Load Balancer Classic Load Balancer
Protocols HTTP, HTTPS TCP TCP, SSL/TLS, HTTP, HTTPS
Platforms VPC VPC EC2-Classic, VPC
Health checks
CloudWatch metrics
Logging


Path-Based Routing

Host-Based Routing
Native HTTP/2
SSL offloading
Static IP
Elastic IP address
Slow start


Pre-Step 1) we will have two EC2 instance; one we will have Windows 2008 server and another Linux Server


Step 1) In here we have two Websites ; one running on Linux Machine on Default port #80 and another one on Windows IIS Webserver on port 8080


Step 2) inside the IIS we need to go to IIS manager and change the binding to point to port 8080 and also create a custom rule so that the Windows Firewall will accept port 8080 as inbound


Step 3) When you install IIS webserver; you will have a folder called C:\inetpub\wwwroot


Then inside above folder ; make sure create a file and called it healthy.html and make sure you will be able to access via IE browser; that is  http://x.x.x.x:8080/healthy.html


http://54.236.241.245:8080/healthy.html


Step 4) make sure on Linux machine you will have a file inside the folder

cd /var/www/html a filed called healthy.html ( otherwise your health check will not work) we will see it inside the lab.

So make sure when you type this in IE browsers http://54.174.68.136/healthy.html

you will see something ( use your own IP address)


Step 5) Now we will go over the labs ; the goal is that when we create a network  ELB ; when you type in the URL:80 it goes to Linux Machine and when you type in URL:8080 it will go to Windows Machine.


Step 6) First we will configure the two Target Group (this is the best way to do it) then we will create Network ELB


Step 7) First I create a Target group called:

  • WindowsGP1 ( Make sure pic TCP port 8080)
  • LinuxGP2 (make sure pic TCP port 80)


Step 8) for both group, when you do the health check, make sure pick HTML and in both cases use file healthy.html (remember we have created these file inside the Linux and Windows machine on corresponding folder)


Step 9) after you have created the target group ; you need to go to each Target group and click on the Target Tab ; then you need to pick correct EC2 and make sure you click add to register it and make sure save it. ( do not forget to save it).


Step 10) Now I will go create my Network ELB ; and in here make sure add two listeners in here , one for TCP port 80 and another one for TCP port 8080


Step 11) Make sure you will pick correct AZ and pick correct AZ in correct Public Subnet that you have , as you see in here we have choice of IP address ( we did not have this choice in Class ELB or Application ELB)


Step 12 ) We can also pick Elastic IP address. ( lets not do it now)


Step 13) Next we need to pick the Target group , so we can pick any of the target group for now I will pick WindowsTG1 ( it does not matter as we will see later on ).


Step 14) As you see when you pick the WindowsTG1 , it will fill in with the parameter we filled up before.


Step 15) Now if you go back to Target group on the left side and click on the description ; you will see in front of Load balancer , the Network ELB ; but when


you go to LinuxTG2 ; you do not see it ; since when I was doing step 12 in above ; I pick the WindowsTG1


Step 16) when you look at TAB called Target Tab on WindowsGP1 , you will see it says healthy ( which is good) but when you go under the Target tab of LinuxGP2, I see “Unused”  since we did not pick on step 12


Step 17) Now let’s go to LoadBalancer on the Left side and when you click on the Listener ; it is Pointed to Windows; but we need to point windows only for port 8080 and Linux to point to port 80, so next to port 80 , click on it and the click edit; then pick Linux ,


Step 18) Make sure now port 80 goes to Linux

Port 8080 goes to Windows on the Listener Tab.


Step 19) Now if I go to left side and click on the Target group ; then when you click on the LinuxTG2 , you will see it is being initialized (first) then it will be healthy.

Step 20) If you go to ELB and click on the descriptions TAB and the copy and paste long DNS name you should be able to get the Linux machine with port 80 and Windows machine with port 8080


http://networkelb-f4556e12cdccebde.elb.us-east-1.amazonaws.com:8080/


Posted by & filed under Amazon AWS.


Monitoring EC2 with Custom Metrics


You can monitor your EC2 using CloudWatch using:

  • CPU
  • Network
  • Disk
  • Status Check

Please note that RAM Utilization is a customer metric. By Default Ec2 monitors is for 5 mins interval, unless you enable detailed monitoring which will then make it 1 min intervals ( it will cost more)


Let’s go to google and search for Amazon EC2 Metrics and Dimensions


https://docs.aws.amazon.com/AmazonCloudWatch/latest/monitoring/ec2-metricscollected.html


we will do a lab and we will create a new EC2 and then we do customize Cloudwatch metric for Memory.


Step 1) We need to create a  CloudWatch Role for EC2 so the EC2 can send some information to CloudWatch


Step 2) Go to IAM , and create a new Role called EC2CloudWatch


Step 3) Pick CoudWatchFullAccess as a Policy


Step 4) Now we will go and create an EC2 instance, then attached above Role to it ; then we will use some Perl Script so that we get customize Memory Utilization


Step 5) Before we do our lab, let’s go to google and type Monitoring Memory and Disk Metrics for EC2 Linux instance


https://docs.aws.amazon.com/AWSEC2/latest/UserGuide/mon-scripts.html

After we login into EC2 Linux, we will go to aparticular directory and run this Command


curl https://aws-cloudwatch.s3.amazonaws.com/downloads/CloudWatchMonitoringScripts-1.2.2.zip -O


Step 6) Now I will go to AWS and start new EC2 instance ( Linux)


Step 7) if you login into Linux, type these


sudo su

yum update –y


Step 8) Now we will install the Perl Script : ( install perl Syslogs and Protocols)


sudo yum install -y perl-Switch perl-DateTime perl-Sys-Syslog perl-LWP-Protocol-https perl-Digest-SHA.x86_64


Step 9) Now I will make a directory that we will install all of our stuff

Type:

mkdir /cloudwatchlab

cd /cloudwatchlab

Step 10) now we will paste the curl commands from Amazon Websites

curl https://aws-cloudwatch.s3.amazonaws.com/downloads/CloudWatchMonitoringScripts-1.2.2.zip -O

Step 11) Now we will unzip it

Step 12) If you type ls we will see it did create a directory called aws-scripts-mon


Now I will remove the Zip file that we downloaded


rm –rf CloudWatchMonitoringScripts-1.2.2.zip


Step 13) I go to the directory

cd aws-scripts-mon/

Then type ls and you see some perl script ( in green color)

mon-put-instance-data.pl

mon-get-instance-stats.pl


Step 14) Now before we push these script to Ec2 , lets go back to AWS console and look at Cloudwatch and we will see there is no Metric for Memory , but after we push above perl scripts ; we will see the Memory Utilization metrics


Step 15) Go to the Dashboards and create a new Dashboards and put CPU utilization ( as we see we do not Memory Utilization)


Call the Dashboard EC2custommetric (make sure save it)


As you click on EC2 and you will see these metric (as I mentioned in the beginning of Lab)


You can monitor your EC2 using CloudWatch using:

  • CPU
  • Network
  • Disk
  • Status Check

Step 16) Now we go back to our terminal windows and copy and paste this command from AWS websites


I will put this line of code to test and see if our EC2 instance can talk to CloudWatch


./mon-put-instance-data.pl –mem-util –verify –verbose


(Make sure run it at directory called aws-scripts-mon)


As we see we are ok Now.


Verification completed successfully. No actual metrics sent to CloudWatch.


Step 17) Now we will make sure we push the RAM utilization to cloud watch


Copy and paste


./mon-put-instance-data.pl –mem-used-incl-cache-buff –mem-util –mem-used –mem-avail


As we see it say successful

Successfully reported metrics to CloudWatch. Reference Id: 37ce5b72-48ae-11e8-800c-6be073b72519


Step 18) Now we do not want to do manually the above task we want to automated and we can use a concept called “crontab


Step 19) Go to directory etc


cd /etc

nano crontab

then go all the way down and type


*/5 * * * * root ./mon-put-instance-data.pl –mem-used-incl-cache-buff –mem-util –mem-used –mem-avail


Make sure in above remove the . and go to directory you had / cloudwatchlab/aws-scripts-mon


So correct line will be :

*/5 * * * * root /cloudwatchlab/aws-scripts-mon

/mon-put-instance-data.pl –mem-used-incl-cache-buff –mem-util –mem-used –mem-avail


Hint remember the directory is case sensitive


Exit and make sure save it.